Picture this a warm San Diego evening, the smell of smoke rising from the grill, your family gathered around a beautiful outdoor kitchen you designed yourself. Sounds perfect, right? Knowing how to design an outdoor kitchen is more achievable than most homeowners think, and with the right planning, your backyard can become the most-used room in your home.
Whether you’re starting from a blank patio or upgrading an existing setup, the process involves far more than choosing a grill. Layout, materials, appliances, lighting, and budget all play equal roles. At San Diego Whole Home Remodeling, we’ve helped hundreds of San Diego homeowners turn underused backyard spaces into fully functional, beautiful outdoor kitchens and this guide covers everything we’ve learned along the way.
Why Outdoor Kitchens Are a Smart Home Upgrade
Before diving into the how-to, it’s worth understanding why outdoor kitchens have become one of the top kitchen trends in residential remodeling. According to the National Association of Realtors, outdoor kitchens can return up to 100% of their investment at resale making them one of the highest-ROI home improvements available.
Beyond value, they transform how you use your home. Families cook, dine, and entertain outdoors more than ever. If you’re designing an outdoor kitchen from scratch, you’re not just building a cooking station, you’re expanding your living space year-round.
Step 1: Define Your Outdoor Kitchen Purpose
The very first question you need to answer before anything else: what will this kitchen actually do? Your answer determines almost every other decision you’ll make.
Are you a weekend griller who wants a simple cooking zone? Or do you envision a full dining experience with a bar, pizza oven, and seating for 20? Are you cooking for a small family or hosting large gatherings? Will you use it seasonally or year-round?
Being specific here saves money, prevents design regret, and ensures your outdoor kitchen design genuinely fits your lifestyle, not just the Pinterest photo you saved two years ago.
Step 2: Choose the Right Location
Location affects everything: safety, utility access, comfort, and convenience. Here’s what to consider when deciding where to place your outdoor kitchen:
- Proximity to the house: The closer you are to your indoor kitchen, the easier it is to run utilities (gas lines, water, electrical) and carry supplies back and forth.
- Wind direction: Position your grill so smoke doesn’t blow toward seating areas or back into the house.
- Sun and shade: Early morning sun can be pleasant; afternoon sun in San Diego in July is brutal. Plan for shade with a pergola, umbrella, or overhang.
- Utility access: Gas, plumbing, and electrical connections should be factored in early running utilities long distances across a yard significantly increasing costs.
Step 3: Pick the Best Layout
This is the most critical design decision you’ll make. The layout determines workflow, traffic flow, and how practical your kitchen actually feels day to day. The right layout depends on your available space, budget, and how you cook.
Straight Layout
Best for small patios or tight spaces. Everything lines up along one wall grill, counter, and storage in a single row. Simple, cost-effective, and easy to install.
L-Shape Layout
The most popular outdoor kitchen design for mid-size backyards. Two counters meeting at a 90-degree corner create natural zones: cooking on one side, prep and serving on the other.
U-Shape Layout
Ideal for larger spaces and serious outdoor chefs. Three connected sections create maximum counter space and storage. This layout supports multiple cooks and a full dining experience.
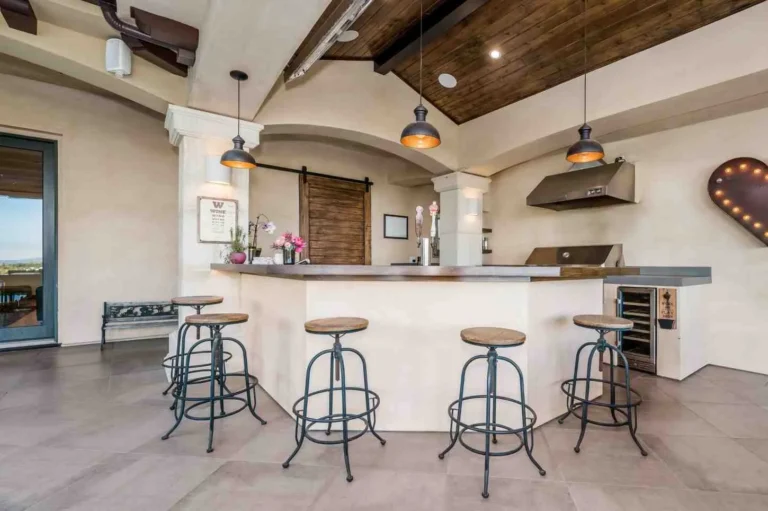
Island Layout
A freestanding island works beautifully as a social hub. Guests can sit on bar stools on one side while you cook on the other. This is the luxury choice and one of the standout top kitchen trends for upscale outdoor spaces right now.
Step 4: Select Must-Have Appliances
When designing an outdoor kitchen, appliance selection comes down to how you cook and what you entertain. Here are the essentials:
- Grill: The centerpiece of any outdoor kitchen. Choose between gas (most convenient), charcoal (best flavor), or built-in kamado style.
- Sink: Running water outdoors is a game-changer. It eliminates constant trips inside and keeps your workflow efficient.
- Outdoor refrigerator: Keeps drinks, marinades, and prep ingredients within reach. Look for units rated specifically for outdoor use.
- Side burners: Great for sauces, sides, and boiling things that don’t belong on the grill.
- Pizza oven (optional): One of the most-requested luxury add-ons, and a genuine crowd-pleaser for entertaining.
Step 5: Choose Durable, Weather-Resistant Materials
Materials can make or break an outdoor kitchen. Everything needs to handle sun, rain, heat, and humidity without deteriorating. Here’s what works:
- Stainless steel cabinets: Like oak kitchen cabinets indoors, outdoor cabinets need to look great and function well for years. Stainless steel is the gold standard rust-resistant, easy to clean, and handles temperature swings without warping.
- Stone or concrete countertops: Both handle heat well and hold up outdoors. Avoid materials like laminate or wood they don’t last outside.
- Porcelain or concrete pavers for flooring: Slip-resistant, weather-resistant, and easy to clean after a messy barbecue night.
Just as you’d choose the best type of paint for kitchens, one that resists humidity and is easy to wipe clean outdoor surfaces need the same functional-first thinking applied to weather exposure instead.
Step 6: Plan Storage and Seating
A well-designed outdoor kitchen has a place for everything: utensils, spices, cleaning supplies, trash, and more. Without proper storage, counters get cluttered fast.
- Cabinets and drawers: Plan for at least 3-4 drawers near your grill for tools and accessories.
- Seating: Bar seating works like a kitchen peninsula vs island debate bar stools at a raised counter keep guests close without crowding your cooking zone, while a separate dining table gives a more formal dining feel.
- Trash and recycling: Build a dedicated pull-out trash cabinet. You’ll thank yourself the first time you host a party.
Step 7: Built-In vs Freestanding Outdoor Kitchen
This is a choice many homeowners overlook until they’re mid-project. Here’s a clear comparison:
Built-in outdoor kitchens are permanent structures, concrete blocks or steel frame with countertops. They look high-end, add real home value, and feel like a true extension of your home. They cost more ($10,000–$50,000+) and take longer to install.
Freestanding kitchens use modular units or portable grilling stations. They’re more affordable, easier to move, and great if you’re renting or not ready to commit to a permanent structure. Budget: $2,000–$10,000.
Step 8: Lighting, Shade, and Comfort Features
An outdoor kitchen you can only use during daylight hours is only half a kitchen. Plan for these comfort elements from the beginning:
- Lighting: Undercounter LED lights, task lighting over the grill, and string lights for ambiance create both function and atmosphere.
- Pergola or shade structure: This is often the difference between a space you use three months a year and one you use year-round, especially important in San Diego’s sunny climate.
- Ceiling fans and heaters: A ceiling fan under a pergola makes summer evenings comfortable; a patio heater extends your season into cooler months.
Step 9: Budget Planning
One of the most-searched questions about how to create an outdoor kitchen is: what does it cost? Here’s a realistic breakdown:
- Basic setup ($5,000–$15,000): Gas grill, simple countertop, basic storage, and a concrete pad. No sink or refrigerator.
- Mid-range design ($15,000–$35,000): Full built-in setup with grill, sink, refrigerator, bar seating, and pergola.
- Luxury outdoor kitchen ($35,000–$80,000+): Full appliance suite, pizza oven, premium stone surfaces, custom lighting, shade structure, and heating.
Think of it like making a small kitchen look bigger. The smartest decisions are strategic, not necessarily expensive. A well-planned mid-range kitchen often outperforms a luxury kitchen with poor layout.
Step 10: Common Mistakes to Avoid
Most outdoor kitchen problems come from planning oversights. Here are the most common:
- Poor ventilation: Building a covered outdoor kitchen without proper ventilation is a fire and carbon monoxide hazard. Always ensure your grill has adequate airflow.
- Wrong materials: Using indoor-rated appliances or non-weather-resistant cabinets leads to rust, warping, and early failure.
- Ignoring workflow: Place your grill, sink, and prep area in a logical triangle the same principle that makes indoor kitchens efficient.
- Overcrowding: A compact, well-organized kitchen functions better than a sprawling one with no clear purpose to each zone.
- Skipping permits: Many built-in outdoor kitchens require building permits. Skipping this step can cause headaches when you sell your home.
DIY vs Hiring a Professional
DIY makes sense for freestanding setups, modular units, or simple grill stations with no utility connections. If you’re comfortable with basic construction and your project doesn’t involve gas lines, plumbing, or electrical, a DIY approach can save significant money.
But for built-in kitchens, especially those requiring gas line installation, structural work, or electrical hookups, hiring licensed professionals isn’t just smart, it’s required by code. For complex outdoor kitchen design projects in San Diego, working with experienced remodelers like San Diego Whole Home Remodeling ensures your kitchen is safe, code-compliant, and built to last.
You can explore more about our approach on our San Diego Kitchen Remodeling service page.
Outdoor Kitchen Design Ideas for Every Style
Not sure what aesthetic fits your home? Here are four directions that work beautifully:
- Modern outdoor kitchen: Sleek stainless steel, concrete countertops, linear lighting, and minimal ornamentation. Clean, sophisticated, and timeless.
- Rustic style: Natural stone, wood accents (where protected), and a brick pizza oven create a warm, inviting outdoor kitchen that feels like it’s always been there.
- Small backyard kitchen: A straight or L-shape layout, compact appliances, and vertical storage can make even a small patio feel generous. Just like techniques to make a small kitchen look bigger work indoors, smart zoning works magic outdoors.
- Luxury outdoor space: Full U-shape or island layout, full appliance suite, integrated bar, fireplace, and resort-level lighting. This is the full expression of outdoor living.
Final Thoughts
Learning how to design an outdoor kitchen is one of the most rewarding home improvement journeys you can take. Done right, it transforms your backyard from wasted space into your family’s favorite gathering place, a place where memories are made around good food and open skies.
Whether you’re planning a simple grill station or a full luxury outdoor kitchen, the key is thoughtful planning: right location, smart layout, durable materials, and a budget that reflects your real goals. Don’t rush the design phase every hour spent planning saves three hours of fixing things later.
Ready to bring your outdoor kitchen vision to life? Contact us at San Diego Whole Home Remodeling today. Our team specializes in outdoor kitchen design and full San Diego Kitchen Remodeling projects that combine craftsmanship, durability, and style. Let’s build something you’ll love for decades.
Frequently Asked Questions
How much space do you need for an outdoor kitchen?
A functional outdoor kitchen needs a minimum of 80–100 square feet for basic cooking and counter space. For a full dining and entertaining setup, plan for 200–400 square feet. Always account for seating clearance and allow at least 36 inches of walking space around your cooking area.
What is the best layout for an outdoor kitchen?
For most homeowners, the L-shape layout strikes the best balance between functionality, cost, and space efficiency. It naturally separates cooking and prep zones while leaving room for guests. Larger spaces often benefit from a U-shape or island layout when designing an outdoor kitchen for entertaining.
What materials last longest outdoors?
Stainless steel, concrete, natural stone, and porcelain tile are the most durable choices for outdoor kitchen design. Avoid wood (unless properly sealed and covered), laminate, and indoor-rated materials. For cabinetry, 304-grade stainless steel is the industry standard for outdoor use.
Is an outdoor kitchen worth it?
For most homeowners, yes especially in warm climates like San Diego. Outdoor kitchens expand your living space, significantly increase home value, and improve day-to-day quality of life. The key is choosing a design and budget that fits your actual lifestyle, not just what looks impressive in photos.
Do I need a permit to build an outdoor kitchen?
In most California cities, yes especially for built-in structures with gas, electrical, or plumbing connections. Always check with your local building department before starting construction. A licensed contractor will handle permit applications as part of their service.