Your bathroom or kitchen tiles might look perfectly fine, but if the grout between them is cracking, turning dark, or crumbling at the edges, your space is already sending a signal. Worn grout is not just an eyesore. It allows moisture to seep behind the tile surface, which can cause serious water damage over time. Whether you are a homeowner who wants to tackle this yourself or someone looking to understand what the job involves before hiring a pro, this guide covers everything you need.
At San Diego Home Remodeling, we see this situation regularly. Homeowners come to us after years of dealing with grout that has slowly deteriorated, and they are always surprised at how dramatically a proper regrout tile job transforms a space without requiring a full renovation.
Signs It Is Time to Regrout Bathroom Tile
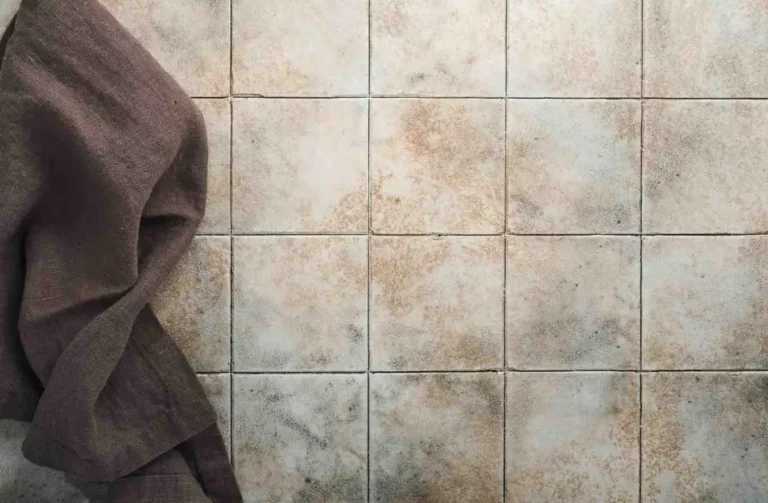
Before picking up any tools, you need to know what you are looking for. Not every dirty grout line needs to be replaced. Some grout just needs a good cleaning. But these signs tell you that cleaning is no longer enough and that re grouting tiles is the right move:
- Cracks running along the grout lines, even hairline ones, allow water to get underneath
- Grout that crumbles or falls out when you press on it lightly
- Persistent dark staining or mold that does not respond to cleaning products
- Grout that has shrunk and pulled away from the tile edges
- Discoloration that covers most of the floor or wall, not just isolated spots
If your existing grout shows two or more of these signs, it is time to replace grout in tile rather than try to patch it.
What You Will Need Before You Start
Good preparation makes this job much smoother. Gather all your tools before you begin so you are not stopping midway through.
Tools:
- Oscillating multi-tool or manual grout removal tool
- Grout float for spreading new grout evenly
- Shop vacuum
- Bucket and mixing paddle
- Painter’s tape and plastic sheeting
- Damp sponge and clean cloths
- Safety goggles and a dust mask
Materials:
- Grout mix (sanded for joints wider than 1/8 inch, unsanded for narrower joints)
- Grout sealer to protect the finished surface
- Grout haze remover (optional but helpful)
Choosing the right grout matters. For shower walls, many professionals recommend a polymer-modified grout because it resists staining better than standard cement-based options. Epoxy grout is the most durable choice and does not require sealing, but it is harder to work with.
How to Regrout Bathroom Tile: Step by Step
Step 1: Prepare the Work Area
Cover the drain with masking tape so debris does not enter your plumbing. Lay down plastic sheeting over your tub, countertops, and any fixtures you cannot remove. If possible, remove handles and faucet covers so you have full access to the tile surface. The coarse grout dust from this job can scratch fixtures if left unprotected.
Step 2: Remove Old Grout
Grout removal is the most labor-intensive part of this project, and it is where most DIYers underestimate the time involved. Use an oscillating tool fitted with a grout removal blade and work carefully along each joint. Hold the blade at a slight angle and move slowly. Rushing this step risks chipping the tile.
Work in small sections and use a shop vacuum to pull away loose debris as you go. You do not need to remove every last particle, but the joints should be clear to a depth of at least 2 to 3 millimeters for the new material to bond properly.
For tight corners or areas around fixtures, a manual carbide-tipped grout saw gives you more control than a power tool.
Step 3: Clean the Tiles
Once the old material is out, vacuum the entire area thoroughly, then wipe down the tile surface with a damp sponge. Make sure you remove all dust and loose particles from inside the joints. Any remaining debris will prevent the new grout from adhering correctly.
Let the area dry completely before moving to the next step. Moisture trapped in the joints is one of the most common reasons a fresh regrout job fails early.
Step 4: Mix and Apply New Grout
Mix your grout according to the manufacturer’s instructions. The consistency should resemble peanut butter. Too watery and it will shrink and crack. Too thick and it will not spread into the joints evenly.
Load your grout float and press the material firmly into the joints at a 45-degree angle, working diagonally across the grout lines. This diagonal motion forces the grout deep into each joint rather than dragging it back out. Work in sections of about three to four square feet so the material does not begin setting before you can clean it.
To apply new grout correctly, make sure every joint is packed full with no air pockets. Press firmly and go over each section twice.
Step 5: Clean the Tile Surface
Wait 15 to 30 minutes after applying, then use a damp sponge and clean water to wipe the tiles in a circular motion. Rinse the sponge frequently and change the water often. You are removing the excess grout from the face of the tiles, not from inside the joints.
A powdery residue called grout haze will remain on the tile surface after this step. Once the grout has firmed up, buff it away with a dry soft cloth. For stubborn haze, a commercial grout haze remover works well.
Step 6: Allow to Cure
Do not use the shower, bath, or tiled area for 24 to 72 hours. The grout needs time to cure properly. Using the surface too early is one of the most common mistakes, and it often means the work has to be redone.
Step 7: Apply Grout Sealer
This step is skipped far too often, and it is the reason so many regrout jobs look dirty within a year. A grout sealer penetrates the surface of cement-based grouts and creates a barrier against water, soap scum, and staining. Apply it with a small brush or applicator bottle, running it directly along each joint.
Wipe away any excess sealer from the tile face before it dries. Most sealers need 24 hours to fully cure before the surface gets wet. Reapply the sealer once a year as part of your regular home improvement tips for keeping tile looking fresh.
How to Clean and Seal Grout After Regrouting
Knowing how to clean and seal grout properly is what separates a regrout job that lasts five years from one that lasts fifteen. For regular upkeep, use a pH-neutral tile cleaner and a stiff brush on the joints every few weeks. Avoid bleach-based products on colored grout because they fade the pigment over time.
For a deeper clean before sealing, a steam cleaner is highly effective. It lifts embedded grime from the joints without chemical damage. After cleaning, let the surface dry for at least 24 hours before applying a fresh coat of grout sealer.
If you are also tackling related work around the home, projects like Luxury Home Remodeling often include complete tile refreshes as part of a broader bathroom or kitchen overhaul. It is worth thinking about what else might benefit from attention at the same time.
Can Tile Be Regrouted Without Replacing the Tiles?
Yes. Can tile be regrouted without touching the tiles themselves? Absolutely, and it is one of the most cost-effective upgrades you can make. As long as the tiles are intact and the adhesive behind them is still holding, you only need to address the joints. This is a much cheaper option than renting.
However, if any tiles are cracked, hollow-sounding when tapped, or pulled away from the wall, those need to be reset before you regrout. Applying new grout over a loose tile traps moisture and makes the underlying problem worse.
How Much Does It Cost to Regrout Tile?
If you choose the DIY route, materials typically run between $50 and $150 for a standard bathroom. That includes grout, tools, a grout sealer, and cleaning supplies.
Hiring a professional typically costs between $7 and $28 per square foot for labor and materials, depending on tile size, grout type, and the overall bathroom size. Most homeowners pay between $600 and $2,500 for a full shower regrout, with the average project landing around $1,500.
For home sellers or landlords looking for a quick cosmetic refresh before listing a property, this is one of the highest-return investments you can make per dollar spent. A fresh set of grout lines can make a bathroom look nearly new without the cost of a full renovation.
If you are considering something larger, explore options like San Diego whole home Remodeling to understand how tile grout repair fits into a broader project scope. Related projects worth considering include Exterior Home Remodeling Ideas that bring the same level of care to your home’s exterior, and How to Remodeling Outdating Stairs, which covers another high-impact area of the home.
Conclusion
Re grouting tiles is one of those projects that delivers a significant visual payoff with a manageable amount of effort. Whether you do it yourself or bring in a professional, the result is a cleaner, fresher, and better-protected surface that adds real value to your home. The key is not rushing the process. Proper grout removal, thorough cleaning, and consistent application all determine how long the job holds up.
If you are ready to move forward, San Diego Home Remodeling is here to help you get it done right. Our team handles everything from simple tile grout repair to full bathroom overhauls, and we bring the same care to every detail. Contact us today for a consultation and let us show you what a difference properly done tile work can make.
Frequently Asked Questions
How often should you regrout bathroom tile?
Most grout in a regularly used bathroom lasts 10 to 15 years with proper sealing and maintenance. If you notice cracking, significant discoloration, or crumbling before that point, it is worth addressing it sooner to prevent water damage behind the tile.
Can tile be regrouted over existing grout?
In most cases, no. Applying new grout directly over old grout rarely works well because the new layer has nothing solid to bond to. Remove old grout to a depth of at least 2 to 3 millimeters first for the best results and a long-lasting finish.
What is the difference between sanded and unsanded grout?
Sanded grout contains fine sand particles and is used for joints wider than 1/8 inch because it resists shrinking. Unsanded grout is smoother and works best in narrow joints. Using the wrong type can lead to cracking or incomplete filling of the grout lines.
How long does regrouting take to dry before use?
Most grout needs 24 to 72 hours to fully cure before the area gets wet. Check the manufacturer’s recommendation on your specific product. Applying a grout sealer after curing adds an extra layer of protection and extends the life of the job significantly.
Is regrouting a good DIY project for beginners?
Yes, regrout bathroom tile is one of the more beginner-friendly home repair projects as long as you take your time. The grout removal step requires patience, but the rest of the process is straightforward. Using a grout float correctly and keeping a clean damp sponge nearby during application makes a noticeable difference in the final result.