Old paint on a metal gate, railing, or fixture rarely just looks tired. It traps moisture, hides early rust, and eventually flakes off in a way that makes solid metal look neglected. If you have ever scraped at a stubborn patch and gotten nowhere, you know that removing paint from metal properly is the difference between a clean, lasting surface and a rushed job that peels again in months.
At San Diego Home Remodeling, we run into painted-over hardware, railings, and metal trim on nearly every renovation project, and the right method depends far more on metal type and paint condition than most guides admit.
Table of Contents
Quick Answer: Best Method by Situation
If you only have a few minutes, here is the short version. Match your situation to the method below, then jump to that section for the full process.
Situation | Best Method | Typical Time | Difficulty |
Detailed or shaped metal (hinges, railings) | Chemical paint stripper | 30 minutes to 2 hours | Easy |
Large flat surfaces (doors, panels) | Heat gun | 1 to 3 hours | Moderate |
Light paint plus surface rust | Sanding or wire wheeling | 1 to 4 hours | Moderate |
Heavy multi-layer paint on structural metal | Media blasting or electrolysis | Half day to full day | Advanced |
Small hardware, no chemicals wanted | Boiling water or vinegar soak | 20 to 40 minutes | Easy |
Tools and Materials You'll Need
Before you start any paint removal from a metal project, lay everything out. Stopping halfway through to hunt for a missing tool almost always means the stripper dries out or the heated paint cools before you can scrape it.
Essential Tools
- Paint scraper with a flat and an angled blade
- Wire brush rated for metal
- Sandpaper in 60, 100, and 150 grit
- Rubber gloves rated for chemical use, safety goggles, and an N95 or organic vapor respirator
- Drop cloth or disposable tray to catch paint chips
Optional Power Tools
- Orbital sander for flat panels
- Angle grinder with a wire wheel attachment for heavy rust and paint combined
- Heat gun with adjustable temperature settings
- Shop vacuum with a HEPA filter for lead paint dust
Before You Start: Testing for Lead Paint
If the metal was painted before 1978 in the United States, or before 1960 in many older San Diego neighborhoods with original hardware still in place, assume lead paint is a possibility until you test it. A lead test swab from a hardware store changes color within seconds and costs very little compared to the health risk of skipping it. Sanding or heating lead paint creates dust and fumes that are dangerous to inhale, so if the test comes back positive, a chemical paint stripper applied wet, rather than dry sanding or heat, keeps the lead contained instead of airborne. This single step changes which method you should choose, so do it before picking a technique, not after.
Method 1: Chemical Paint Stripper (Best for Detailed Metal)
A paint stripper on metal is the most forgiving option for anyone new to this kind of project because the chemical does the softening work instead of you.
Step-by-Step Process
- Wipe the surface clean of dust and grease so the stripper makes full contact with the paint.
- Brush on a thick, even coat of stripper, working in one direction rather than back and forth.
- Let it sit for the time listed on the product, usually 20 minutes to an hour, and cover it with plastic wrap if you need a longer soak on thick layers.
- Scrape at a low angle once the paint bubbles and wrinkles. It should lift in sheets, not crumbs.
- Neutralize and rinse according to the label, since leftover chemical residue can block primer from bonding later.
Best Stripper Types (Gel vs Liquid vs Soy-Based)
Gel strippers cling to vertical and curved surfaces, which makes them the practical choice for railings, hinges, and ornamental ironwork. Liquid strippers work faster on flat horizontal surfaces but run off anything upright. Soy-based and citrus strippers take longer to work, often 45 minutes or more, but produce far less harsh fumes, which matters if you are working in a garage or attached space without heavy ventilation.
When to Use / When to Avoid
Reach for a chemical paint remover from metal when the piece has carved detail, multiple paint layers, or is too thin to risk warping under heat. Avoid it on metal you plan to leave bare and untreated, since some strippers leave a slight etch that shows once the paint is gone.
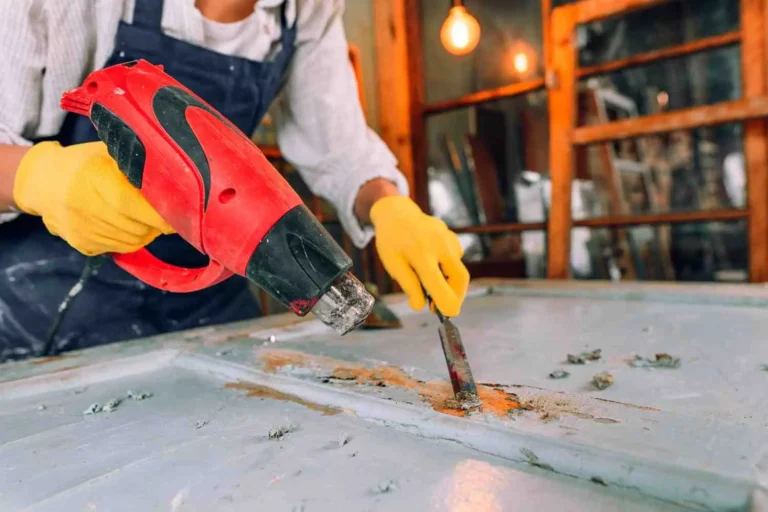
Method 2: Heat Gun Paint Removal (Fastest for Large Areas)
A heat gun softens paint in seconds and skips the wait time that chemical stripping requires, which makes it the fastest hands-on method for large flat pieces.
Step-by-Step Process
- Work outdoors or with a window open, since heated paint releases fumes that are stronger than most people expect.
- Hold the gun 2 to 4 inches from the surface and keep it moving in a slow sweep.
- Watch for bubbling, which signals the paint is ready to lift.
- Scrape immediately while the section is still warm, working in small areas rather than the whole surface at once.
- Repeat on any spots that did not fully release on the first pass.
Pros, Cons and Warping Risks
The clear advantage is speed with no chemical odor and no drying time. The downside is control. Holding the gun in one spot for even a few extra seconds can scorch paint or, on thin sheet metal and aluminum, cause visible warping that no amount of sanding fixes afterward. If you are working on aluminum trim or thin gauge steel, test an inconspicuous corner first before committing to the whole piece.
Method 3: Sanding, Grinding and Wire Wheeling
Sanding gives the smoothest finished surface of any method and is usually the last step regardless of which technique removed the bulk of the paint.
Step-by-Step Process
- Start with 60 grit to cut through paint quickly on flat sections.
- Move to 100 grit to remove what the coarse pass left behind and smooth out scratches.
- Finish with 150 grit so the surface is ready for primer.
- Use an orbital sander on large flat areas and hand sand curves, edges, and tight corners.
Choosing the Right Grit Progression
Jumping straight from coarse to fine grit is one of the most common errors in metal paint stripping, because it leaves deep scratches that show through the new topcoat. Working through each grit in order, without skipping a step, is what actually produces a smooth result, even though it takes a few extra minutes.
Method 4: Media Blasting and Electrolysis (Professional-Grade Options)
For structural metal with heavy rust and years of layered paint, sanding and stripper can only go so far. Media blasting uses an abrasive, such as crushed glass or soda, propelled at the surface to strip paint and texture the metal in one pass. Electrolysis uses a mild electrical current in a water and washing soda solution to lift paint and rust from smaller cast iron or steel pieces without any abrasion at all. Both require equipment most homeowners do not own, and this is usually the point where a DIY project becomes a job better handed to a specialist.
Natural and Non-Toxic Paint Removal Methods
Not every project needs chemicals, especially on small or delicate pieces.
Vinegar and Baking Soda Method
Heat white vinegar until warm, apply it to the painted area, and let it sit for 10 to 15 minutes. The mild acid softens light paint layers, and a wire brush finishes the job. This works well on thin, old paint on hooks, hinges, and small décor pieces but will not touch thick multi-coat paint.
Boiling Water Method (for small hardware)
Submerge small hardware in a disposable pot of simmering water for 5 to 10 minutes until the paint bubbles and lifts. Scrape it off while the piece is still warm and wear gloves to avoid burns. This is one of the cheapest ways to remove paint from metal hardware without buying a single product.
Which Method Works Best for Each Metal Type
Not every metal reacts to these methods the same way, and this is the step most guides skip entirely.
Metal Type | Recommended Method | Method to Avoid | Why |
Steel | Sanding, heat gun, or stripper | None major | Durable, handles all methods well |
Cast Iron | Wire wheel, electrolysis | Aggressive chemical soaking | Porous surface traps residue |
Aluminum | Chemical stripper, gentle sanding | Heat gun | Warps and discolors under heat |
Brass | Chemical stripper, soft brush | Coarse sanding or grinding | Soft metal scratches easily |
Galvanized Steel | Chemical stripper | Sanding through the zinc coating | Removes rust protection layer |
Stainless Steel | Sanding, stripper | Steel wool | Steel wool embeds particles that rust |
How to Remove Rust and Paint Together
When rust and old paint show up on the same surface, treat them in one pass rather than two separate projects. Start with a wire brush to knock off flaking paint and loose rust, then follow with 60 grit sandpaper to grind down what remains. Once the surface is bare, apply a rust converter to any spots that are still discolored, let it cure fully, and degrease with denatured alcohol before priming. Skipping the degreasing step is one of the most common reasons paint adhesion on metal fails within the first year.
Cost and Time Comparison: DIY Paint Removal
Method | Avg. Time | Avg. Tool/Material Cost | Best For |
Chemical stripper | 30 min to 2 hrs | $15 to $30 | Detailed pieces |
Heat gun | 1 to 3 hrs | $30 to $60 (one-time tool cost) | Large flat areas |
Sanding/grinding | 1 to 4 hrs | $10 to $25 | Finishing, light rust |
Media blasting/electrolysis | Half day+ | $75+ or hire a pro | Heavy, structural jobs |
Natural methods | 20 to 40 min | Under $5 | Small hardware |
Preparing the Bare Metal Surface for Repainting
Cleaning and Degreasing
Wipe the surface down with mineral spirits to remove any leftover chemical residue or oils from the stripping process. Rinse with clean water and dry it completely with a lint-free cloth, since even light moisture left on bare metal can start rust within hours.
Applying Primer to Prevent Rust
Apply a metal-specific primer within a few hours of finishing paint removal. Bare iron and steel begin oxidizing almost immediately when exposed to air and moisture, so waiting even a day or two can undo all the prep work. If you are planning a full repaint after stripping, our San Diego House Painting Services team can handle everything from priming to the final topcoat with products matched to the specific metal you are working with.
Safety Precautions and Proper Disposal
Work in a ventilated space, whether that means an open garage door or working outdoors entirely. Wear thick chemical-rated gloves, not standard latex, along with safety goggles and a respirator rated for organic vapors when using any paint stripper on metal. If lead paint is a possibility, wet methods and a HEPA vacuum keep dust from becoming airborne. Once you are done, do not leave paint-soaked rags in a pile, since some strippers are flammable and can combust as they dry. Check your local household hazardous waste program for proper disposal of stripper residue and rags rather than putting them in regular trash.
Common Mistakes to Avoid
Skipping grits when sanding leaves scratches that show through new paint. Holding a heat gun too long in one spot scorches or warps thin metal. Leaving chemical residue on the surface blocks primer from bonding properly. Rushing the dry time before priming is one of the fastest ways to cause bubbling and peeling later. Each of these mistakes is easy to avoid once you know to watch for it, but they are also the most common reasons a paint remover from a metal project needs to be redone.
Read More: How to Paint a Ceiling
When to Hire a Professional Instead of DIY
If the project involves large structural metal, heavy rust across a wide area, or suspected lead paint on something you cannot easily move outdoors, it is worth calling in help rather than pushing through with DIY tools. San Diego Home Remodeling handles metal surface restoration as part of larger painting and remodeling projects, and knowing when a job has outgrown a weekend DIY attempt saves both time and the risk of damaging the metal permanently.
Conclusion
Learning how to remove paint from metal correctly comes down to matching the method to the metal and the condition of the paint, not defaulting to whichever tool is closest at hand. Chemical stripping suits detailed and shaped pieces, heat guns handle large flat areas fast, and sanding delivers the smoothest final result before priming.
Whatever method you choose, proper prep and a timely primer coat are what actually make the new finish last. If your project has grown beyond a weekend job, contact San Diego Home Remodeling and our team will handle the surface restoration, priming, and repainting from start to finish.
FAQs
What is the easiest way to remove paint from metal?
A chemical paint stripper is generally the easiest method since you apply it, wait, and scrape, without needing much physical effort or specialized skill. Gel formulas work especially well on vertical or detailed metal surfaces.
Can I remove paint from metal without damaging it?
Yes, as long as you match the method to the metal type. Soft metals like brass and aluminum do better with chemical strippers or gentle hand sanding rather than heat guns or coarse grinding, which can scratch or warp them.
How do I know if old paint on metal contains lead?
Use a lead test swab, available at most hardware stores, on a small section of the paint. If it changes color, treat the removal process as a lead-safe job using wet methods instead of dry sanding or heat.
Do I need to prime metal after removing paint?
Yes. Bare metal starts oxidizing almost immediately once exposed to air, so applying a metal-specific primer within a few hours of finishing paint removal from metal protects the surface until you are ready to repaint.
Is it cheaper to remove paint from metal myself or hire someone?
DIY paint removal typically costs under $30 in materials for small to medium projects, but large or heavily rusted structural metal often costs more in time and redone work than hiring a professional from the start.