Most homeowners picture the finished kitchen in their minds before the work even starts. New granite countertops, a clean modern sink, everything polished and in place. What they don’t always picture is the process that gets them there. Granite and sink installation is one of those projects where small mistakes can turn into big, expensive problems. A cracked slab, a leaking drain, or a poorly cut countertop for sink opening can cost far more to fix than it would have cost to do right the first time.
This guide walks you through every step, from choosing the right sink type to making the final plumbing connections. Whether you’re a hands-on homeowner who wants to understand the full process, or someone comparing options before hiring a contractor, you’ll find clear, honest answers here. San Diego Home Remodeling has handled hundreds of these projects, and the information below reflects what actually works in the field.
Drop-In Sink vs Undermount: Which One Is Right for You?
Before any cutting or drilling starts, you need to decide what type of sink you’re installing. This choice affects everything from how the countertop cutout for sink is made to how the finished surface looks and cleans.
A drop-in sink sits on top of the granite. The rim rests along the edge of the cut opening and is visible from above. These are easier to install and less expensive, but crumbs and water tend to collect along that rim over time. Drop-in sinks are a practical choice for bathrooms or secondary kitchens where simplicity matters more than appearance.
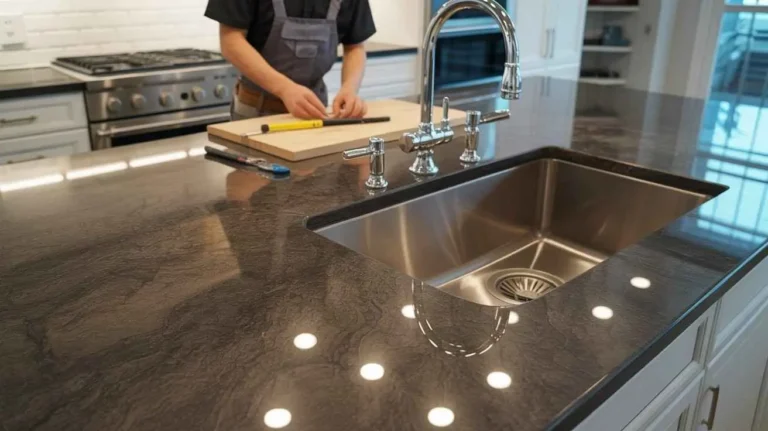
An undermount sink installation is the opposite. The sink attaches from below the granite, leaving the stone surface clean and uninterrupted. There is no rim to collect debris.
Wiping the counter means wiping directly into the sink. This style looks more polished and is the preferred choice in most kitchen remodels today. It does require more precise cutting and a stronger adhesive bond, but the result is worth it when done correctly.
When choosing between the two, think about how you use the space. In a high-traffic kitchen, the seamless surface of an undermount sink makes daily cleaning faster. In a bathroom with a thicker granite vanity, either option can look great depending on the basin style.
Tools Needed for Granite Installation and Sink Prep
Getting the tools right before you start saves time and prevents damage. Granite is unforgiving. You cannot patch a bad cut.
For the countertop cutout and installation:
- Diamond-tipped wet saw or circular saw with a diamond blade
- Angle grinder with polishing pads
- Jigsaw with a diamond or carbide blade (for the sink cutout)
- Wet/dry vacuum
- Level and measuring tape
- Silicone caulk (100% waterproof, color-matched to stone)
- Two-part epoxy adhesive for undermount mounting
- Suction cups or sink clips depending on sink type
- Safety glasses and gloves
For plumbing connections for sink:
- Adjustable wrench and basin wrench
- Plumber’s putty or silicone
- P-trap assembly
- Supply lines (hot and cold)
- Drain assembly with strainer
Having everything staged before starting means you won’t rush a step because you’re missing a part. Rushing on granite leads to cracking.
How to Install Granite Countertops with Sink: Step by Step
This is the full step by step granite countertop installation process, covering both the stone and the sink together.
Step 1: Measure and Template the Space
Accurate measurement is the foundation of a good installation. A professional fabricator will typically visit the job site and create a physical or digital template before cutting any stone. For DIY homeowners, use a rigid cardboard or luan template to trace the exact shape of the cabinet run, noting the location of the sink base, cooktop cutouts, and wall angles.
Measure the sink itself and mark the cutout location on the template. Most undermount sinks require the opening to be slightly smaller than the sink’s outer rim so the stone overlaps and supports it from below. Check the manufacturer’s spec sheet for exact dimensions.
Step 2: Cut the Countertop Cutout for the Sink
This is the most critical step. A diamond blade jigsaw or circular saw with a diamond blade is used to cut the opening. Always work on a padded surface and keep the stone wet during cutting to prevent the blade from overheating and cracking the granite.
Cut slowly and follow your template line exactly. Once the opening is made, use a diamond polishing pad on an angle grinder to smooth and finish the edge inside the cutout. For undermount sinks, this edge will be partially visible, so a clean, finished cut matters.
Do not skip the polishing step. A rough cut edge weakens the stone right where it bears the weight of the sink.
Step 3: Apply Silicone and Set the Countertop
Run a bead of 100% silicone along the top edges of the base cabinets. Lower the granite into position carefully. Because granite slabs can weigh 15 to 20 pounds per square foot, this step usually requires two or more people. Never set a slab alone.
Once the stone is in place, check it with a level. Shimming may be needed at certain cabinet points. Let the silicone cure fully before adding any weight or continuing work.
Step 4: Mount the Undermount Sink
For undermount sink installation, the process works from below. Apply a thick bead of two-part epoxy adhesive around the rim of the sink opening on the underside of the granite.
Press the sink up into position, aligning it with the cutout. Use bar clamps, suction cups, or a temporary wooden brace across the sink basin to hold it in place while the epoxy cures.
Some installers also add undermount sink clips that anchor to the cabinet walls or a mounting bracket. This adds mechanical support beyond the adhesive alone and is a good practice, especially for larger, heavier sinks like cast iron.
Let the epoxy cure for the full time listed on the product label, usually 24 hours. Do not rush this step.
Step 5: Connect the Plumbing
Once the sink is set and the adhesive has cured, the plumbing connections for sink can be made. This includes:
- Drain assembly: Apply plumber’s putty under the strainer flange, insert into the drain opening, and tighten the mounting nut from below. Wipe away excess putty.
- P-trap: Connect the drain tailpiece to the P-trap and then to the drain line in the wall. Make sure the P-trap has a slight downward slope toward the wall drain for proper flow.
- Supply lines: Connect hot and cold supply lines to the faucet valves underneath the sink. Hand tighten first, then snug with a wrench. Do not overtighten on compression fittings.
- Faucet: If installing a new faucet, it’s easier to mount it to the sink before final installation. Check that the faucet handles don’t interfere with the cabinet doors.
Once everything is connected, turn the water supply back on slowly and check for leaks at every joint. Run water for a few minutes and inspect the drain, the supply connections, and around the sink perimeter.
What Does Granite and Sink Installation Cost?
The sink installation cost varies quite a bit depending on the sink type, the scope of the countertop work, and whether you hire a professional or take the DIY route.
Here’s a general breakdown:
- Granite countertop installation (material + labor): $45 to $200 per square foot depending on granite grade, edge profile, and local labor rates
- Undermount sink installation (labor only, assuming countertop is already in place): $200 to $500
- Basic drop-in kitchen sink installation: $150 to $350
- Full kitchen sink installation with new faucet, drain, and supply lines: $300 to $700
- Cost to install granite and sink in kitchen as a complete package: $1,500 to $5,000+ depending on slab size and sink type
For homeowners planning a bathroom project at the same time, the San Diego Bathroom Remodeling services can often bundle countertop and sink installation work to reduce overall labor costs. You may also want to review related resources on topics like Do You Need a Permit to Remodel a Bathroom, as some jurisdictions require permits for plumbing work even if it’s part of a countertop upgrade. Homeowners remaking the full bath layout, including questions like How to Fit a Freestanding Tub in Small Bathroom or exploring Tub to Shower Conversion Ideas, can often combine these projects for better value. Those considering a full spa-style upgrade may also find it useful to research How Much Does a Jacuzzi Bath Remodel before setting a budget.
Common Mistakes to Avoid
Even experienced DIYers make these errors when tackling granite countertop installation alongside sink work.
Cutting the sink opening too large. Once the stone is cut, it cannot be uncut. Always measure the opening slightly smaller than needed and test-fit before making the final cut.
Skipping the edge polish on the cutout. A raw diamond-cut edge is sharp and slightly weaker than a polished one. Any undermount sink installation should include polishing the sink cutout edge.
Using the wrong adhesive. Standard construction adhesive breaks down under wet conditions. Use two-part epoxy specifically rated for stone and undermount applications.
Not supporting the sink during cure. If the sink shifts before the epoxy fully cures, the bond is compromised. Always use clamps or a brace system for the full cure period.
Rushing the plumbing. Leaks under a granite counter are not easy to spot until water damage shows up in the cabinet below. Take time to check every joint carefully before closing up the space.
When to Hire a Professional
The DIY approach works well for homeowners who are comfortable with power tools and basic plumbing. But granite and sink installation does carry real risk. Cracking a granite slab during installation is not a fixable mistake. The slab usually has to be replaced entirely.
If any of these apply to your project, professional installation is the smarter call:
- The granite slab is premium or exotic stone with a high material cost
- The sink is cast iron or extra-large format (heavy undermount)
- The plumbing requires moving drain lines or supply rough-in locations
- You’re working with custom edge profiles or complex mitered corners
- You have no prior experience cutting stone
A professional team can complete a standard kitchen sink installation with a full granite countertop in one to two days. The cost is predictable and the result is guaranteed.
Conclusion
Granite and sink installation done right transforms a kitchen or bathroom from ordinary to genuinely impressive. The combination of natural stone and a clean, functional sink setup is one of the most popular upgrades homeowners make, and for good reason. It adds value to the home, improves daily function, and gives the space a finished, professional look.
If you’re planning this project and want it done with zero guesswork, reach out to San Diego Home Remodeling for a consultation. The team brings hands-on experience with every stage of the process, from templating and cutting the slab to final plumbing connections and quality checks. A project like this deserves experienced hands from start to finish, and getting it right the first time is always less expensive than fixing it later.
Frequently Asked Questions
How long does granite and sink installation take?
A standard kitchen installation with one slab and an undermount sink typically takes one full day for fabrication and template, and a second day for the actual installation and plumbing connections. If the granite is being fabricated off-site, plan for three to five business days between templating and the final install day.
Can I install an undermount sink myself without professional help?
Yes, but it requires precision. The countertop cutout for sink must be measured and cut correctly, the epoxy bond must be applied and cured properly, and the plumbing connections for sink need to be watertight. Homeowners with experience using power tools and basic plumbing knowledge can handle it, but mistakes on granite are costly since the stone cannot be patched.
What is the difference between granite countertop installation cost and just sink installation cost?
Granite countertop installation covers the stone material, fabrication, edge work, and setting the slab. Sink installation cost covers the labor of mounting the basin, sealing it to the stone, and connecting the drain and supply lines. These are separate scopes of work and are usually quoted separately by contractors.
Does installing a new sink always require a permit?
In most cases, a direct sink replacement that uses the existing drain and supply rough-in does not require a permit. However, if you’re moving plumbing locations or adding new lines as part of a larger kitchen remodel, a permit may be required. Check with your local building department before starting any work that changes your plumbing rough-in.
What type of silicone should I use around the sink on granite?
Use 100% waterproof silicone caulk rated for kitchen and bath use. Avoid general-purpose construction caulk, which can shrink or discolor over time. For an undermount sink installation on dark granite, a color-matched silicone keeps the joint nearly invisible. Apply a clean, even bead and tool it smooth before it skins over.