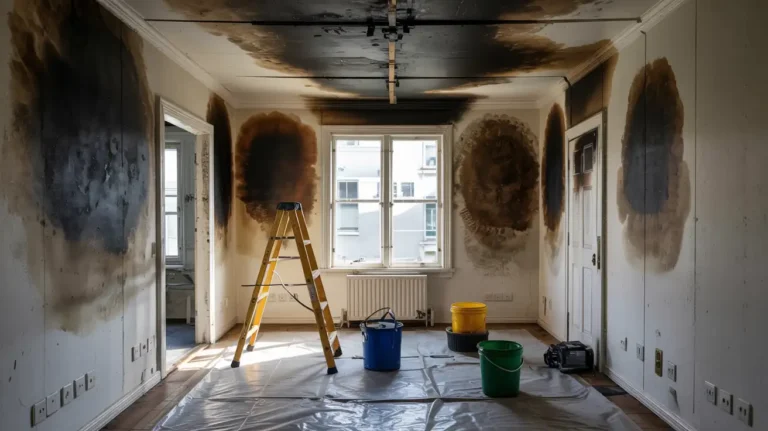
Smoke damage doesn’t wait. The black soot on your walls and ceiling bonds deeper into surfaces with each passing hour, creating permanent stains and health risks. How to clean smoke damage on walls and ceiling requires the right safety gear, dry cleaning sponges, TSP solution, and a systematic three-phase approach that prevents spreading residue while protecting your lungs from toxic particles.
We’ve restored over 500 smoke-damaged homes in San Diego since 2002. Most people make the same mistake: they grab a wet sponge and start scrubbing, which smears soot deeper into the walls. This guide shows you the professional method that actually works.
Table of Contents
How to Remove Soot: Safety First

Your lungs are more valuable than your walls. Soot particles contain toxic compounds from burned plastics, foams, and synthetic materials. These microscopic particles cause respiratory problems, bronchitis, and long-term health issues.
Required safety equipment:
- N95 respirator mask (not a dust mask)
- Nitrile rubber gloves (disposable)
- Safety goggles with side shields
- Long sleeves and pants you can throw away
- Shoe covers or old sneakers
Turn off your HVAC system immediately. Your air conditioning will spread soot particles throughout your entire house in under 30 minutes. Open windows on opposite sides of the room to create cross-ventilation. Position box fans to blow air outside, not into other rooms.
Critical warning: Never touch soot with bare hands. Soot penetrates skin and contains carcinogens. If you have asthma, heart conditions, or are pregnant, don’t attempt this cleanup. The health risks outweigh any cost savings.
Cover your floors with plastic sheeting, not cloth drop cloths. Cloth traps soot particles that later release into the air. Tape plastic sheets to baseboards so loose soot doesn’t escape underneath.
Test your cleaning approach on a hidden wall section first. Some paints react badly to certain cleaning solutions. Wait 24 hours to see if the test spot discolors, bubbles, or shows other damage.
What Cleaning Materials Do I Need To Remove Smoke Damage?
Professional soot removal requires specific tools. Regular household cleaners make smoke damage worse by spreading oily residue.
Essential cleaning supplies:
- Dry cleaning sponge – Also called chemical sponges or soot sponges. These yellow vulcanized rubber sponges lift dry soot without water. Buy 4-6 sponges because they get saturated quickly. Cost: $3-5 each at hardware stores.
- HEPA vacuum – Standard vacuums blow tiny soot particles back into the air. HEPA filters trap 99.97% of particles. Rent one from Home Depot for $40/day if you don’t own one.
- Trisodium phosphate (TSP) – This high-alkali detergent cuts through smoke’s oily residue. Mix 1 tablespoon TSP per gallon of warm water. Wear gloves when handling TSP powder. Alternative: Savogran TSP substitute if you have septic systems.
- Degreaser – Dawn dish soap works for light smoke damage. Heavy damage needs industrial degreasers like Simple Green or Krud Kutter.
- White vinegar – Mix 1 cup vinegar with 3 cups warm water for natural cleaning. Vinegar neutralizes smoke odors while cutting grease.
Other materials:
- Two 5-gallon buckets
- Clean microfiber cloths (12-15)
- Spray bottles
- Step ladder (6-foot minimum)
- Painters tape
- Plastic sheeting
Cost breakdown: Expect to spend $80-120 for DIY supplies to clean a 200 square foot room. Professional smoke damage restoration costs $2,000-6,000 for the same space, depending on severity.
Understanding Smoke Damage Types
Not all smoke damage cleans the same way. The fire’s oxygen level determines your cleaning approach.
- High-oxygen fires produce dry, powdery soot. Kitchen fires and wood-burning fires create this type. Dry cleaning sponges remove high-oxygen soot effectively. Never use water first or the soot smears permanently.
- Low-oxygen fires create thick, oily soot. Smoldering fires from cigarettes, electrical fires, or fires starved of oxygen make greasy residue. This smoke damage requires wet cleaning solutions with degreaser.
Look at your walls. Dry soot wipes off easily with your finger. Oily soot feels sticky and leaves a film on your finger. This 5-second test determines your entire cleaning strategy.
How To Clean Smoke Damage Off Walls
Cleaning smoke off walls requires patience and the right sequence. Rushing this process creates permanent staining.
Phase 1: Dry Soot Removal
Start at the top corner of your wall. Hold your HEPA vacuum nozzle 1/2 inch away from the wall surface. Don’t touch the wall with the nozzle or you’ll smear soot. Work downward in 3-foot sections, using gentle suction to pull loose soot particles.
Take your dry cleaning sponge and wipe in straight, overlapping strokes. Use light pressure. The sponge’s porous surface traps soot particles without water. Work from ceiling to floor to prevent soot from falling on cleaned areas.
Rotate your sponge after every 2-3 strokes. Once all sides turn black, slice off 1/4 inch with a utility knife to expose fresh sponge, or grab a new one. Don’t rinse soot sponges with water this destroys their effectiveness.
One room generates 2-3 pounds of loose soot on walls. This phase takes 45-60 minutes for a standard bedroom. Don’t skip it or phase two will smear soot into permanent stains.
Phase 2: Deep Cleaning
Mix your TSP solution in bucket one. Bucket two holds clean rinse water. Change rinse water every 15 minutes.
Dip your microfiber cloth in a TSP solution and wring it until barely damp. Oversaturating walls causes water damage, especially on drywall. Wipe walls using circular motions in 2×2 foot sections.
Work methodically from top to bottom, left to right. TSP’s alkaline formula breaks down the tar and creosote bonding soot to paint. You’ll see yellow-brown residue transfer to your cloth.
Rinse each section immediately with a clean, damp cloth from bucket two. Leaving TSP on walls too long can dull paint or damage wallpaper. Dry each section with a fresh towel.
Smoke stains on walls lighten considerably after this phase, but oily residue remains. That’s normal. Phase three addresses it.
Phase 3: Degreasing
Your third pass targets oil-soluble smoke particles that TSP can’t remove. Mix degreaser according to bottle directions in fresh warm water.
Apply degreaser with a new microfiber cloth using the same sectional approach. The degreaser dissolves greasy soot particles that create that yellow tint and lingering smoke odors.
After degreasing, perform a final rinse with plain warm water. Pat walls completely dry with clean towels. Moisture trapped in drywall leads to mold growth within 48 hours.
Special considerations for painted walls:
Flat paint absorbs smoke damage deeper than semi-gloss or gloss finishes. You might need to repaint after cleaning. Apply stain-blocking primer first or smoke stains bleed through new paint.
Test your paint’s washability. Rub a small area gently. If paint comes off on your cloth, you’ll need to repaint rather than clean.
Wallpapered walls present challenges. Water seeps behind wallpaper, causing it to peel. Use minimal moisture and dry immediately. Severe smoke damage requires wallpaper replacement.
Time estimate: Cleaning smoke damage from a 12×12 room with 8-foot ceilings takes 4-6 hours using this three-phase method. That’s 320 square feet of wall surface.
How To Clean Smoke Damage Off Ceilings

Ceilings accumulate the heaviest soot deposits because smoke rises. Cleaning ceilings requires the same three-phase approach but with extra precautions.
Set up your 6-foot step ladder on stable ground. Work in 3×3 foot sections to minimize ladder repositioning. Overhead work causes arm fatigue, so take breaks every 20 minutes.
Use your HEPA vacuum on the ceiling first, holding the nozzle at a slight angle to prevent soot from falling on your face. Wear your safety goggles during this step.
Apply your dry cleaning sponge to the ceiling using straight strokes, not circular motions. Circular wiping on ceilings drops more soot. Move the sponge away from your body to avoid soot falling on you.
Transfer your TSP solution to a spray bottle for ceiling work. Spray a light mist on your microfiber cloth, not directly on the ceiling. Overhead spraying drips solution into your eyes and creates runs on walls.
Wipe the ceiling section, rinse with a barely damp cloth, and immediately dry. Gravity works against you on ceilings. Water drips create streaks that are harder to remove than the original smoke damage.
Textured and popcorn ceilings:
These surfaces trap soot deep in their texture. Dry cleaning sponges work, but you’ll use twice as many. Press very gently or you’ll damage the texture.
Wet cleaning textured ceilings is risky. Too much moisture causes texture to fall off. Use a spray bottle method with minimal water. If texture softens, stop immediately. You’ll need professional smoke damage restoration or ceiling replacement.
Remove light fixtures and ceiling fans before cleaning. Soot accumulates on fan blades and light covers. Clean these separately in a sink with degreaser, or the first time you turn them on, they’ll spread soot particles throughout your cleaned room.
How To Clean Smoke Damage From Carpet
Carpet traps soot particles in its fibers, making removal challenging. Acting fast prevents permanent staining.
Sprinkle baking soda liberally over smoke-damaged carpet. Use an entire box for a 10×10 area. Baking soda absorbs smoke odors and helps loosen soot particles. Let it sit for 2-4 hours, overnight for heavy damage.
Vacuum thoroughly using your HEPA vacuum’s carpet attachment. Make multiple slow passes in different directions. You’ll see significant soot removal in your vacuum canister.
For remaining soot stains, use a carpet cleaning solution or mix 1 tablespoon dish soap with 2 cups of warm water. Blot never scrub soot stains with a clean white cloth. Scrubbing pushes soot deeper into carpet fibers.
Rinse by blotting with a cloth dampened in plain water. Remove all soap residue or it attracts dirt. Use fans to dry carpet completely within 24 hours to prevent mold.
When carpet is beyond DIY cleaning:
Wall-to-wall carpet in rooms with heavy smoke damage usually needs professional cleaning or replacement. Home carpet cleaners lack the extraction power to remove soot embedded deep in padding. Professional equipment uses truck-mounted systems with 10x more suction power.
Soot that has been set for more than 72 hours permanently discolors light-colored carpet. Focus your DIY efforts on walls and ceilings, and budget for new carpet.
Additional Smoke Damage Cleaning Tips
- Address smoke damage within 48 hours. Soot particles chemically bond to surfaces, creating permanent yellow staining. This bonding process accelerates in warm, humid conditions.
- Work systematically room by room. Don’t jump between rooms. Complete one space entirely before moving to the next. This prevents cross-contamination and tracking soot on your shoes.
- Change your clothes between rooms. Your clothing holds soot particles that transfer to clean areas. Keep cleaning clothes separate from your regular laundry.
- Don’t forget hidden surfaces. Smoke damage affects inside closets, cabinet interiors, and spaces behind furniture. Check these areas during your initial inspection.
- Replace HVAC filters immediately. Your filters captured airborne soot during the fire. Running your system with dirty filters circulates soot throughout your home. Install fresh filters before turning your HVAC back on.
- Monitor for recurring smoke odors. Lingering smoke smells after cleaning indicate soot trapped in porous materials like drywall, insulation, or subflooring. You can’t reach this damage with surface cleaning.
- Document everything for insurance. Take photos before, during, and after cleaning. Save all receipts for supplies. If DIY fails and you need professional help, insurance companies want proof of your reasonable attempts.
- Repaint with stain-blocking primer. Even after thorough cleaning, smoke residue can bleed through regular paint. Use oil-based or shellac primers like Kilz or B-I-N before applying finish paint.
When DIY Cleaning Isn't Enough
Professional smoke damage cleanup becomes necessary when:
- The affected area exceeds 100 square feet. DIY cleaning a single room is manageable. Whole-house smoke damage requires professional equipment, including air scrubbers, ozone generators, and thermal foggers.
- Smoke odors persist after cleaning. You’ve removed visible soot but the smell remains. Odor indicates smoke particles trapped inside walls, ductwork, or structural materials. Professional restoration includes ozone treatment that breaks down odor molecules at the source.
- Soot keeps reappearing. You clean a section and hours later see new soot streaks. This indicates soot migration from inside wall cavities or attic spaces. Professionals seal these hidden areas.
- You have porous building materials. Exposed brick, unsealed wood, concrete, or plaster absorbs smoke damage deeper than painted drywall. These materials need specialized cleaning techniques and equipment.
- Your walls show fire damage. Charring, bubbling paint, or structural damage requires inspection by licensed contractors. Cleaning won’t fix compromised building materials.
- You develop respiratory symptoms. Coughing, difficulty breathing, or eye irritation during cleaning means you’re exposed to dangerous soot levels. Stop immediately.
Professional fire and smoke damage restoration includes services beyond cleaning: structural drying, mold prevention, content cleaning and storage, insurance claim documentation, and air quality testing.
Calling In The Experts For Soot And Smoke Damage Removal
Sometimes the smartest decision is knowing when you’re in over your head. Extensive smoke damage requires professional-grade equipment and expertise that DIY methods can’t replicate.
San Diego Home Remodeling specializes in complete fire damage restoration services in San Diego. Our IICRC-certified technicians handle everything from initial damage assessment through final restoration. We’ve cleaned smoke damage in homes ranging from small kitchen fires to major structural fires.
Our process includes industrial air scrubbers that remove 99.99% of airborne particles, thermal fogging that neutralizes embedded smoke odors, and content pack-out services that clean and store your belongings during restoration.
We work directly with insurance companies, documenting damage and providing detailed estimates that ensure you receive fair compensation. Most homeowners don’t realize their insurance covers professional smoke damage repair, including temporary housing if needed.
Average professional restoration costs in San Diego:
- Single room: $2,000-4,000
- Multiple rooms: $5,000-12,000
- Whole house: $15,000-30,000+
These estimates include cleaning walls and ceilings, odor removal, HVAC cleaning, and content restoration. Structural repairs and reconstruction cost extra.
The investment pays off. Professional restoration preserves your home’s value and eliminates health risks from hidden soot particles. DIY cleaning that misses embedded soot creates ongoing air quality problems.
Contact us for a free damage assessment. We’ll inspect your property, explain what’s salvageable, and provide upfront pricing. No pressure, just honest advice from restoration experts who’ve seen it all.
FAQs
What is the difference between dry soot and oily soot?
Dry soot is fine and powdery from fast-burning natural materials. Oily soot is sticky, greasy, and smeary, typically from slow-burning synthetics or kitchen grease. It requires stronger degreasing cleaning solutions.
Can I just paint over smoke stains?
No. You must thoroughly clean smoke off the walls first. Then, you must apply a shellac-based primer (like Zinsser B-I-N) to the walls and ceilings before using regular paint. If you skip this, the smoke stains and odors will bleed through the paint over time.
Why do I need to start cleaning the walls from the bottom up?
You must wipe the walls from the bottom up when using a wet detergent solution. This is a pro technique to prevent dirty detergent from running down onto dry lower areas. Those runs cause permanent smoke streaks on walls that are nearly impossible to eliminate later.
Will vinegar remove smoke odor from my house?
White vinegar acts as a natural odor absorber for mild smells. It helps, but it cannot penetrate materials as deeply as a professional treatment like ozone or thermal fogging. For severe smoke odors, professional damage restoration is usually needed.
What is the most important material to use for initial soot removal?
The most important material is the dry cleaning sponge (or chemical sponge) paired with a HEPA vacuum. These tools allow you to remove the bulk of the loose soot before introducing water, which prevents smearing.


