Want to improve your garden without having to dig big holes or pour concrete? You can build a floating deck in just a few days. It sits right on top of the ground. An easy way for people to add extra living space to their yards without spending much money or hurting their backs is to do this job.
Learning how to build a floating deck takes some planning and basic carpentry skills, but it’s far simpler than building an attached deck. This guide walks you through every step, from choosing your location to installing the final deck board. You’ll learn what materials work best, how much the project costs, and when it makes sense to call in professional help.
Table of Contents
What Is a Floating Deck?
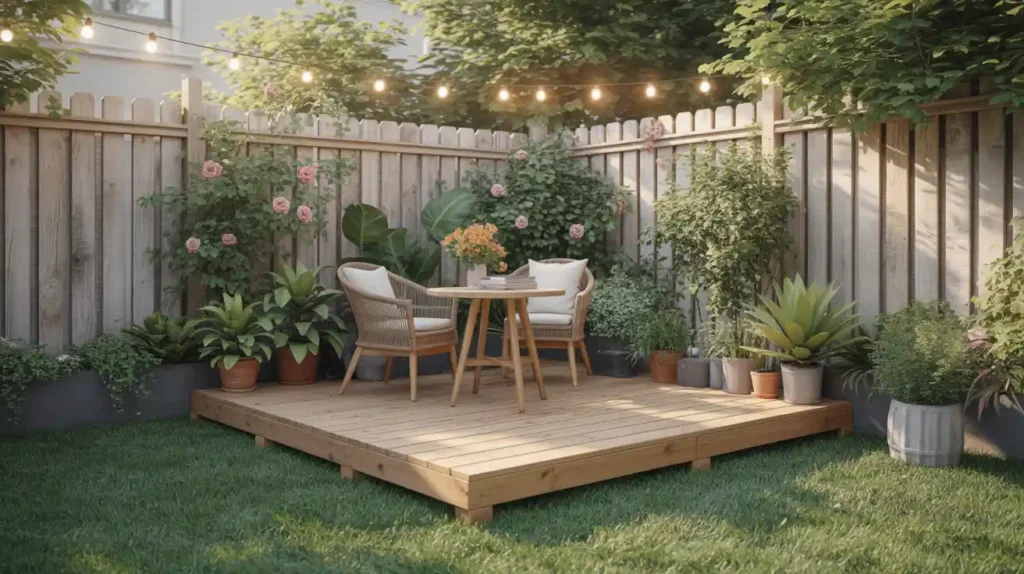
A floating deck is a ground level deck that rests on concrete deck blocks instead of being anchored deep into the soil. Unlike traditional decks that attach to your house with ledger boards, a floating deck stands on its own. This makes it perfect for creating outdoor rooms anywhere in your yard.
These decks typically sit just inches off the ground. The floating decking frame spreads weight across multiple support points using deck blocks and beams. No digging below the frost line is required in most areas, which saves time and effort.
Floating deck construction is allowed in many places without a building permit, though you should always check your local rules first. The lack of permanent foundation makes these decks easier to remove or relocate if needed.
Before You Begin: Critical Planning Steps
Success depends entirely on thorough planning. Do not skip these steps, as they directly address the complex issues that trip up most DIY builders.
Understanding the Frost Line and Local Code
The biggest difference between a floating deck and a permanent deck is the foundation’s relationship to the frost line, the depth at which ground water freezes. Freezing and expanding water creates “frost heave,” which pushes up permanent footings.
A floating deck bypasses this by not being anchored. While this generally removes the need to dig deep footings, the deck blocks can still shift.
Actionable Advice:
- Check Local Codes: Call your local building department. Ask specifically about regulations for a “freestanding, ground-level deck under 30 inches in height.” This is the best way to get the exact rules for your area regarding permits.
- The Key Exemption: Most codes do not require footings to extend below the frost line for structures not attached to the house. This is why you can use concrete deck blocks.
Ground Prep Alternatives: Paver Base vs. Pea Gravel
The stability of your deck relies on what is under the concrete deck blocks. Removing the topsoil and replacing it with a compacted base is crucial.
- Paver Base (Crushed Stone/Gravel): This is the superior option. It locks together when compacted, creating a firm, non-shifting base that drains water quickly.
- Pea Gravel: This also drains well but is rounder and will shift slightly more easily than a paver base.
Recommendation: Use compacted paver base for better, more durable stability.
What You’ll Need
Materials:
- 9-12 concrete deck blocks (depending on size)
- 4×4 pressure treated posts
- 2×6 or 2×8 pressure treated lumber for beams and joists
- Joist hangers and galvanized nails
- Hurricane ties or framing anchors
- Deck boards (wood or composite)
- 3-inch exterior deck screws
- Pea gravel or crushed stone
- Landscape fabric
- Landscape staples
Tools:
- Measuring tape and speed square
- String line and stakes
- Circular saw or miter saw
- Power drill with bits
- 4-foot level
- Post hole digger or shovel
- Wheelbarrow
- Safety glasses and work gloves
How to Build a Floating Deck at a Glance
Building a floating deck using deck blocks follows a logical sequence. Here’s the overview before we dig into details:
- Plan your size, layout, and location
- Mark and level the area
- Set concrete deck blocks
- Install and level beams
- Attach joists with hangers
- Lay down landscape fabric
- Install decking boards
- Add finishing touches
Each step builds on the previous one, so take your time getting the foundation right.
1. Plan Your Size, Layout, and Location
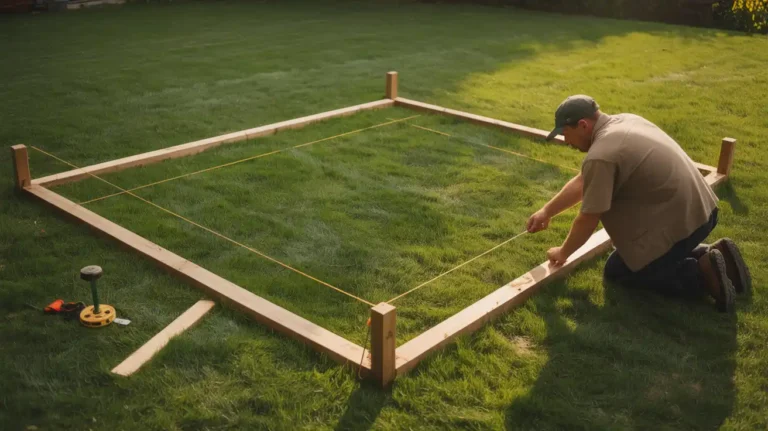
Start by measuring the space where you want to build a floating deck. Use stakes and string to mark the corners. This helps you visualize the final size and make sure it fits your yard and furniture.
Most floating patio designs use deck blocks spaced 4 to 6 feet apart. For a 10×12 deck, you’ll typically need 12 blocks arranged in a 3×4 grid. Larger decks need more support points to prevent bouncing or sagging.
Think about access and traffic flow. Leave room for walkways around the deck. Consider adding a small step or two if the deck sits more than 6 inches off the ground.
Factor in the sun and shade throughout the day. You might want morning sun for coffee and afternoon shade for dinner. Trees provide shade but drop leaves that need cleaning.
2. Mark and Level the Area
Mark the exact spot where the blocks will go with your measuring tape. You can mark where to dig in the grass with spray paint. Each mark should be about 12 inches square, which is bigger than your deck blocks.
To make sure your plan is square, measure from corner to corner across the diagonal. The diagonal measures of both should be within a quarter inch of each other. Change your bets until the numbers match up.
For each block, dig a hole 4 to 6 inches deep. Get rid of all the grass and roots. It should be flat and hard on the bottom, not sloppy or muddy. Fill each hole with two to three inches of pea grit or crushed stone. To pack the dirt down tight, use a hand tamper or the base of a 4×4 post. This keeps it from settling over time.
3. Set Concrete Deck Blocks
Place your first deck block in the highest corner of your site. This becomes your reference point for leveling all the other blocks.
Set the remaining blocks one at a time. Use a long, straight 2×4 and a 4-foot level to check height between blocks. Add or remove gravel underneath to adjust height.
Every block must be level in two directions: front to back and side to side. Even small differences create problems later when you install beams.
Work slowly and check often. Getting blocks level now saves hours of frustration during frame construction. Some builders use composite shims for fine adjustments on top of blocks.
4. Install and Level Beams
Beams run the length of your deck and sit directly on the deck blocks. For most floating deck construction, use double 2×6 or single 2×8 pressure treated boards.
If your blocks aren’t all the same height, cut 4×4 posts to make up the difference. Posts sit in the block cavities and support the beams at a consistent level.
Secure beams to posts or blocks using hurricane ties or framing anchors. These metal brackets prevent the deck from shifting in high winds.
Double-check that beams are level across their entire length. Place your level at multiple spots along each beam. A beam that slopes even slightly will make the whole deck uneven.
5. Attach Joists with Hangers
Joists are the cross pieces that support your deck boards. They run perpendicular to the beams and typically space 16 inches apart, measured from center to center.
Build your outer frame first using 2×6 or 2×8 boards. This creates a rim around your deck’s perimeter. Attach corners with 3-inch deck screws, pre-drilling to prevent splits.
Mark joist locations on your beams every 16 inches. Use a speed square to draw lines that stay straight and consistent.
Install joist hangers at each mark. These metal brackets hold joists firmly while keeping proper spacing. Measure each joist individually before cutting, as small variations in your frame might require different lengths.
Secure each joist in its hanger with the special nails or screws made for joist hangers. Regular nails or screws won’t provide enough holding strength.
6. Lay Down Landscape Fabric
Before installing deck boards, cover the ground underneath with landscape fabric. This blocks weeds from growing up through gaps in your decking.
Roll out the fabric across the entire area under your deck frame. Overlap seams by at least 6 inches to prevent gaps where weeds might sneak through.
Use landscape staples every few feet to hold fabric in place. Pay extra attention around the edges where wind might lift the material.
Some builders skip this step, but removing weeds from under a deck later becomes nearly impossible. The small investment in fabric saves hours of frustration down the road.
7. Install Decking Boards
Start at one end of your deck with your straightest, best-looking board. This first board sets the pattern for all the others, so take time to position it perfectly.
Run boards perpendicular to your joists. Secure each board with two deck screws at every joist. Pre-drilling prevents wood from splitting, especially near board ends.
Leave small gaps between boards for water drainage and wood expansion. A 16-penny nail makes a perfect spacer for pressure treated wood. Composite materials often need different spacing, so check manufacturer guidelines.
Work across the deck one board at a time. Stop every few boards to check that you’re still running parallel to your starting edge. Small adjustments early prevent big problems later.
When you reach the far end, your last board might need ripping to width. Measure carefully at both ends since your deck might not be perfectly square.
8. Add Finishing Touches
Using a rotary saw, cut the ends of all deck boards flush with the rim joists. A chalk line helps you make cuts that are straight across several boards.
Consider adding a picture frame border around the deck’s edge. This cuts the ends of the deck boards and makes them look better by covering them.
Also, sand down any rough spots or splinters that people might come into contact with, like fences and other surfaces. This job can be done quickly with a random circle sander.
Add a simple step if your small floating deck is more than a few inches above the ground. This will make it easy to get on and off. It feels safer to take two or three wide steps than one big one.
Within a few months of building, stain or finish pressure-treated wood with deck stain or sealer. This keeps the wood safe and makes it look better. Composite decking doesn’t need to be sealed, but it seems better when cleaned occasionally.
How Much Does It Cost To Build a Floating Deck?
Building a floating deck typically costs between $15 and $30 per square foot for materials when you do the work yourself. A 10×12 deck (120 square feet) runs roughly $1,800 to $3,600 depending on material choices.
Pressure treated lumber offers the lowest material costs at $15 to $20 per square foot. A basic 10×12 deck might cost $1,800 to $2,400 in materials.
Composite decking raises costs to $25 to $30 per square foot. The same 10×12 deck jumps to $3,000 to $3,600. However, composite lasts 25-30 years with minimal maintenance compared to 15-20 years for wood that needs regular staining.
Here’s a typical material breakdown for a 10×12 pressure treated deck:
- Deck blocks: $80-$120
- Framing lumber: $400-$600
- Deck boards: $800-$1,200
- Hardware and fasteners: $200-$300
- Landscape fabric and gravel: $100-$150
Tool costs add another $200-$400 if you’re starting from scratch. Renting a power miter saw costs about $50 per day and speeds up the work considerably.
Professional installation adds $8 to $15 per square foot in labor. Hiring out the same 10×12 deck would cost $2,800 to $5,400 total, including materials and labor.
Your location affects pricing too. Materials cost more in remote areas with limited supplier competition. Urban areas might charge higher labor rates but offer more material options.
Professional Help When You Need It
Some projects benefit from professional expertise. If your yard slopes significantly, if you want built-in seating or planters, or if local codes seem confusing, hiring pros makes sense.
San Diego Home Remodeling offers complete home remodeling services in San Diego including custom deck design and installation. Our experienced home remodeling team handles everything from permits to final inspection.
Professional builders finish projects faster and guarantee their work. They bring specialized tools and know how to handle unexpected problems like buried utilities or poor soil conditions.
Get at least three quotes before choosing a contractor. Ask to see photos of completed decks similar to what you want. Check references and verify license and insurance status.
Even if you build the deck yourself, consider hiring help for the heaviest work. Having an extra pair of hands when setting beams or installing large deck boards makes the job safer and easier.
FAQs About Building a Floating Deck
Do I need a permit to build a floating deck?
Requirements vary by location. Many areas don’t require permits for floating decks under 200 square feet and less than 30 inches high. Always check with your local building department first. Permit fees typically range from $50 to $200.
How long does a floating deck last?
Pressure treated wood decks last 15 to 20 years with proper maintenance. Composite decks can last 25 to 30 years or more. The concrete blocks and metal hardware last even longer, often 30-plus years.
Can you build a floating deck on uneven ground?
Yes, but it requires more work. You’ll dig deeper holes for blocks on high spots and use taller posts on low areas. The key is getting all blocks level with each other. Slopes up to 6 inches across the deck area are manageable for DIYers.
What’s the maximum size for a floating deck?
Most building codes allow floating decks up to 200 square feet without special engineering. Going larger might require a permit and professional design. Practical limits also depend on how many support points you can add while keeping the deck stable.
How far apart should deck blocks be spaced?
Standard spacing is 4 to 6 feet between blocks. Closer spacing creates a stronger deck that bounces less when people walk on it. Use 4-foot spacing for high-traffic areas or if you plan to place heavy furniture like a hot tub.
Should I use treated lumber or composite decking?
Pressure treated lumber costs less upfront and works well if you don’t mind regular maintenance. Composite decking costs roughly twice as much but never needs staining and resists rot and insects better. Choose based on your budget and how much maintenance you want to do.
Can a floating deck support a hot tub?
Standard floating decks aren’t designed for hot tub weight, which can exceed 4,000 pounds when filled. A hot tub requires closer joist spacing, larger beams, and more deck blocks. Consult a structural engineer before attempting this.
How do you prevent weeds under a floating deck?
Landscape fabric blocks most weeds when installed properly. Remove all grass and roots before laying fabric. Overlap seams and secure with staples. Some builders also spread a layer of gravel over the fabric for extra protection.
What’s the best time of year to build a deck?
Spring and early fall offer ideal conditions with moderate temperatures and lower humidity. Avoid building in extreme heat when you’ll tire quickly or in rain when lumber stays wet and muddy conditions make work difficult. Some pressure treated lumber needs time to dry before staining, so factor that into your timeline.