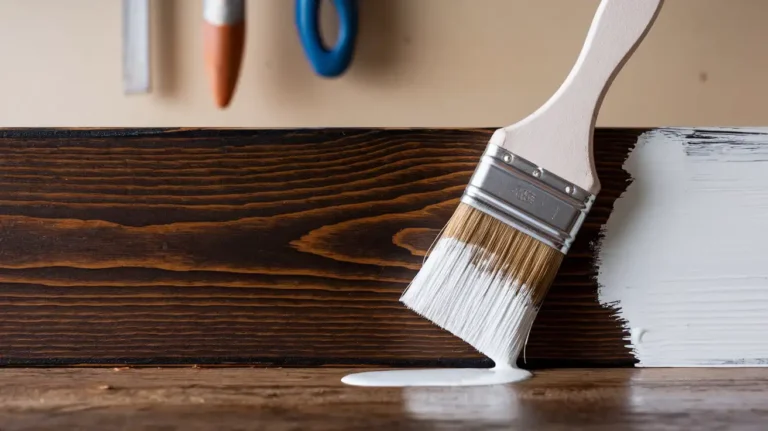
Can you paint over stained wood? Yes, you can paint over stained wood with excellent, long-lasting results. The key is to shift your focus entirely from the top coat of paint to the surface preparation and, most importantly, choosing the correct stain-blocking primer. Skipping this step is the single biggest reason why DIY paint jobs fail and leave your project looking unprofessional.
This guide provides the full professional process, combining decades of experience with product-specific tips, ensuring your new paint adheres perfectly and prevents any wood tannins or old oil stain bleed-through. We’ve broken down the steps to save you time and money.
Table of Contents
How to Paint Over Stained Wood
The process takes 2-3 days from start to finish. Here’s the proven method that prevents peeling and bleed-through.
Step 1: Clean the Surface Thoroughly
Start with TSP cleaner or Simple Green to remove grease, dirt, and built-up grime. Kitchen cabinets especially need this step. Mix TSP according to package directions, scrub with a sponge, then rinse twice with clean water. Let the wood dry completely for at least 4 hours.
Skip this step and your primer won’t bond properly. We’ve seen paint peel off in sheets because someone rushed past cleaning.
Step 2: Fill Holes and Damage
Use wood filler for small dings and scratches. For larger repairs or high-traffic areas like door frames, Bondo works better because it’s harder and sands smoother. Apply with a putty knife, overfill slightly, and let dry per manufacturer instructions (usually 30-60 minutes).
Step 3: Degloss or Sand the Stained Surface
This step separates amateur jobs from professional results. Stained wood has a clear coat (polyurethane or varnish) that’s slick as glass. Paint can’t grip it without proper prep.
Option 1 – Sanding (Safer, More Work):
- Start with 150-grit sandpaper for the main surface
- Switch to 120-grit for stubborn glossy areas
- Finish with 220-grit for smoothness
- Sand until the surface feels slightly rough, not shiny
- Wipe away all dust with a tack cloth
Option 2 – Liquid Sandpaper (Faster, More Dangerous):
Products like Klean Strip deglosser work faster but require serious safety gear. You need chemical-resistant gloves, a respirator with organic vapor filters, and open all windows. The fumes are toxic to people and pets.
Apply with a clean cloth, working in small sections. The surface will dull within seconds. Keep the house ventilated for 3-4 hours after use.
Pro tip from our crew: We sand open areas with 150-grit and use liquid sandpaper only for tight corners and crevices. This gives the best results with less chemical exposure.
Step 4: Apply Stain Blocking Primer
This is where most DIY jobs go wrong. Regular primers won’t stop tannins from bleeding through. You need a true stain-blocking formula.
For most projects: Kilz Premium (water-based) works well and costs $25-30 per gallon. Apply one coat. If you can still see brown tones showing through, add a second coat. Better safe than sorry.
For problem stains or dark wood: BIN shellac-based primer is the gold standard. It’s alcohol-based, dries in 45 minutes, and blocks everything. Downside? It smells terrible and costs $35-40 per gallon. We keep a quart can for spot-priming knots and dark areas.
Apply primer with a quality brush or roller. Don’t overwork it. One smooth coat is better than multiple thin passes.
Let dry 2-3 hours (check the can). Sand lightly with 220-grit between coats if applying multiple primer coats. This creates a glass-smooth base for paint.
Cost reality: Expect to spend $60-90 on primer and prep supplies for an average kitchen cabinet job.
Step 5: Caulk Gaps and Joints
Once the primer dries, caulk any gaps between trim pieces or where cabinets meet walls. Use painter’s caulk (not silicone) because it accepts paint better.
Apply a thin bead, smooth with a damp cloth, and let dry overnight. Never caulk before priming because caulk bonds poorly to bare wood.
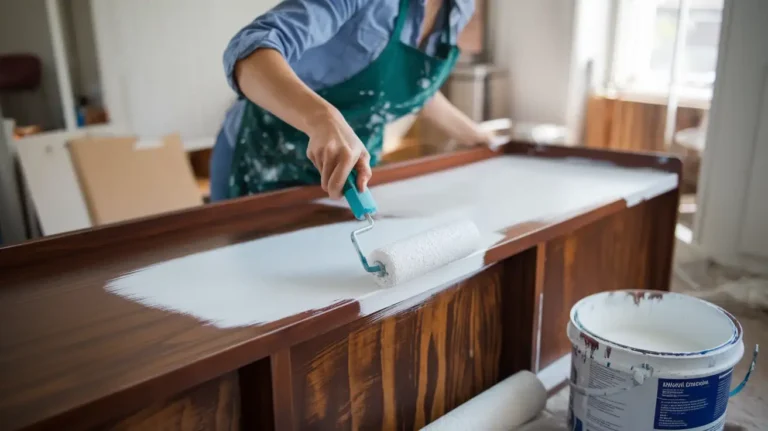
Step 6: Apply Your Topcoat
Now you’re ready for the final paint. Apply 2-3 thin coats rather than one thick coat. Thin coats dry smoother with fewer brush strokes.
Sand lightly with 220-grit between coats. Wipe dust with a tack cloth before the next coat. Wait 4-6 hours between coats (longer in humid weather).
Types of Paint That Can be Used on Stained Wood
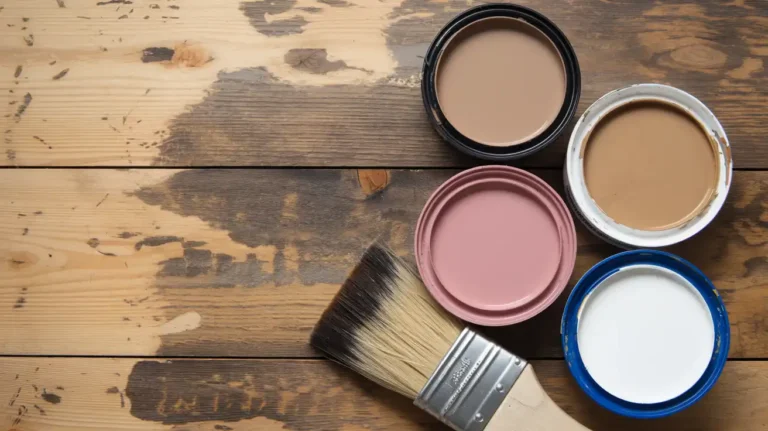
Match your paint type to the original stain for best results. Here’s what works:
Oil-Based Paint
Use over oil based stains. Creates an extremely durable finish perfect for cabinets, doors, and trim. Dries slowly (6-8 hours) but levels out beautifully with minimal brush marks.
- Pros: Hard, scratch-resistant finish that lasts 10+ years
- Cons: Strong odor, requires mineral spirits for cleanup, takes 24 hours to recoat
- Best for: Kitchen cabinets, exterior doors, high-traffic trim
- Cost: $40-60/gallon
- Primer needed: Oil based primer
Latex Paint
Water-based formula ideal for water-based stains. Dries fast (2-4 hours), easy cleanup, low odor. The most popular choice for DIY projects.
- Pros: Low VOCs, soap and water cleanup, affordable
- Cons: Not as durable as oil-based, shows brush strokes more
- Best for: Interior trim, furniture, bedroom cabinets
- Cost: $30-45/gallon
- Primer needed: Latex or water based primer
Acrylic Paint
Another water-based option that’s tougher than standard latex. Resists mildew and UV damage better.
- Pros: More durable than latex, flexible finish resists cracking
- Cons: More expensive than latex
- Best for: Bathroom vanities, exterior wood trim
- Cost: $45-65/gallon
- Primer needed: Latex primer
Oil-Based Enamel
The premium choice for cabinets and doors. Creates a furniture-quality finish that hardens over several weeks.
- Pros: Extremely hard finish, resists scratches and moisture
- Cons: Slow drying (overnight between coats), strong fumes
- Best for: Kitchen cabinets, bathroom vanities, front doors
- Cost: $50-75/gallon
- Primer needed: Oil based primer
Benjamin Moore Advance
Our team’s favorite for interior work. It’s a water-based alkyd that behaves like oil paint but cleans up with water. Dries slowly enough that brush strokes level out.
Cost: $65-80/gallon but worth it for cabinets and built-ins.
Wood Types and Stains That Can be Painted
Not all wood behaves the same when you paint over stains. Here’s what we’ve learned:
Oak (Red or White)
The open grain shows through paint unless you use grain filler first. We prime twice and sand between coats for smooth results. Oak takes paint well but needs patience.
Pine and SPF Woods
These softwoods contain resins that bleed through regular primer. Always use BIN or another shellac-based primer on knots. Pine is budget-friendly but requires more prep work.
Mahogany and Cherry
Dense hardwoods with natural oils. Clean extra thoroughly and use stain-blocking primer. Once prepped properly, they hold paint beautifully for decades.
Maple
The easiest wood to paint. Tight grain, minimal tannin bleeding. Two coats of quality latex primer work fine.
Plywood
Tricky because the surface veneer is thin. Sand gently (220-grit only) and prime with a high-build primer. The edges soak up paint so hit them with extra primer.
Age Matters More Than Species
Fresh stains (under 2 years old) can be softer and may need extra dry time. The old stain (10+ years) gets brittle but usually has a harder topcoat that needs aggressive deglossing.
San Diego climate note: Our dry weather helps paint cure faster, but it also means stain can penetrate deeper into wood. Always test a small hidden area first.
Tips for Getting Professional Results
After 23 years painting stained wood, these tricks make the biggest difference:
Use Quality Brushes and Rollers
A $15 Purdy brush leaves fewer marks than a $3 foam brush. For cabinets, we use 4-inch rollers with mohair or microfiber covers. They hold more paint and create a smoother finish.
The “Tip-Off” Technique
Roll paint onto large flat areas, then lightly drag your brush tip through the wet paint in long strokes. This eliminates roller texture while keeping application fast.
Control Your Environment
Paint in 60-80°F temperatures with moderate humidity. Too hot and paint dries before leveling. Too cold and it stays tacky forever.
Don’t Rush Dry Times
Each coat needs proper cure time. Recoating too soon causes the paint to wrinkle or stay soft. When in doubt, wait an extra hour.
Consider Spraying for Large Jobs
We use a Graco Magnum X5 airless sprayer ($300-400) for kitchen cabinets. It cuts time in half and creates a factory finish. Cheaper option? The Wagner Flexio 590 ($150-200) works for smaller projects.
Mask everything carefully. Spray booths help contain overspray in garages.
Test Your Products First
Paint a hidden area or scrap piece with your chosen primer and paint. Let it dry for 48 hours, then scratch it with your fingernail. Good adhesion means you’re ready for the full project.
When to Walk Away
Some projects aren’t worth DIY effort:
- Damaged or rotted wood (replace instead)
- Very dark stain on light wood (may need 4+ coats)
- Intricate carvings with deep recesses (spray is almost mandatory)
- Wood covered in thick polyurethane (consider professional stripping)
Common Mistakes That Ruin Paint Jobs
- Skipping primer: The stain will bleed through every coat of paint within 6-12 months. No shortcuts here.
- Painting over dirt: Saw dust, grease, or old wax will cause adhesion failure. Clean thoroughly.
- Using the wrong primer: Water-based primer over oil-based stain can peel. Match your products or use a bonding primer.
- Sanding through primer: Light sanding means feathering the surface, not removing primer. If you hit bare wood, re-prime that spot.
- Thick coats: Multiple thin coats always beat one heavy coat. Thick applications sag, drip, and show brush marks.
Real Project Costs (2025 San Diego Pricing)
Here’s what materials actually cost for common projects:
Kitchen Cabinet Repainting (15 doors + boxes):
- Primer: $50-80
- Paint: $80-150 (2 gallons)
- Sandpaper/supplies: $30-40
- Wood filler/caulk: $20-30
- Brushes/rollers: $40-60
- Total: $220-360 DIY
- Professional service: $2,500-4,500 (includes labor, expertise, warranty)
Single Door or Small Furniture:
- Primer: $15-25 (quart)
- Paint: $15-30 (quart)
- Supplies: $20-30
- Total: $50-85 DIY
- Professional service: $150-300
Trim/Baseboard (Average Room):
- Primer: $30-45
- Paint: $40-60
- Supplies: $25-35
- Total: $95-140 DIY
- Professional service: $400-800
Time Investment:
- Cabinets: 20-30 hours over 4-5 days
- Single door: 4-6 hours over 2-3 days
- Room trim: 8-12 hours over 2-3 days
Need Professional Painting Services?
Painting stained wood yourself saves money but demands time, patience, and physical effort. Many homeowners start the project, realize the scope halfway through, and wish they’d called professionals from the start.
San Diego Home Remodeling has painted over stained wood on hundreds of local projects since 2002. Our licensed contractors know which primers work in our climate, how to handle oak cabinets common in older homes, and how to deliver showroom-quality results that last 10+ years.
We offer free estimates, protect your home with proper masking, and guarantee our work. Whether you need kitchen cabinets, built-in bookshelves, or entire home trim painted, our team handles every detail.
Ready to transform your stained wood? Contact us for professional painting services in San Diego. We’ll assess your project, explain your options, and provide transparent pricing. Call today for a free consultation and see why San Diego homeowners trust us for their most important remodeling projects.
Conclusion
Painting over stained wood works beautifully when you follow the right steps. The three non-negotiable requirements are: proper surface prep with sanding or deglosing, true stain-blocking primer, and matching your paint type to the existing stain.
Budget 3-5 days for a proper job. Rushing causes failures that require stripping and starting over. We’ve rescued dozens of DIY disasters where someone skipped primer or didn’t let coats dry properly.
The results are worth the effort. A painted finish can completely change your space, update dated wood tones, and last for years with minimal maintenance. Whether you tackle it yourself or hire professionals, you now know what it takes to do the job right.
FAQs
Can you paint over stained wood without sanding?
No, not safely. You can use liquid sandpaper (a chemical deglosser) instead of physical sanding, but you must remove the glossy topcoat somehow. Paint applied over a slick polyurethane surface will peel within months. The stain blocking primer needs something to grip.
Can you paint over stained wood without priming?
Never skip primer. Wood tannins will bleed through your applied paints and create brown spots or streaks. This can happen immediately or months later. Stain-blocking primer is mandatory for durable results. It’s the cheapest insurance against redoing work.
Can you paint over freshly stained wood?
No. Fresh stains need to cure fully before painting. Oil based stain takes 24-48 hours to dry to touch but needs 3-7 days to cure completely. Water-based stains cure faster (1-3 days). Check the manufacturer’s instructions. If the surface feels tacky or smells strongly, wait longer.
What kind of paint do you use over stained wood?
Match oil-based paint to oil-based stain, or latex/acrylic paint to water-based stain. Don’t know what your stain is? Test an inconspicuous area with denatured alcohol. If color comes off on your rag, it’s water-based. If not, it’s oil-based. When in doubt, use oil-based primer (it works over both) then your preferred topcoat type.
How many coats of primer do you need on stained wood?
One coat usually works for light-colored stains in good condition. Apply a second coat if you can still see brown tones showing through the first primer coat. Dark stains like walnut or ebony often need two primer coats. The rule: if it looks more brown than white after the first coat of paint, add another coat of primer first.
Can you paint over varnished wood without removing the varnish?
Yes, but only if you sand or degloss the varnish first. The shiny clear coat must be dulled so the primer can adhere. Use 150-grit sandpaper until the surface feels rough, not slick. Wipe away dust, prime with stain-blocking primer, then paint normally.
Is painting over stained wood better than stripping and restaining?
It depends on your goal. Painting is faster, cheaper, and covers imperfections. Restaining highlights the natural wood grain but requires complete stripping (time-consuming and messy). Paint lasts longer with less maintenance. Stain shows scratches and wear more quickly. For modern, uniform color, paint wins. For natural wood beauty, restrain.
How long does painted wood last compared to stained wood?
Quality painted wood lasts 10-15 years indoors before needing a refresh. Stained wood requires maintenance every 3-5 years (cleaning and new topcoat). Exterior painted wood needs repainting every 7-10 years. Stained exterior wood needs retreatment every 2-3 years. Paint offers better long-term protection with less frequent maintenance.