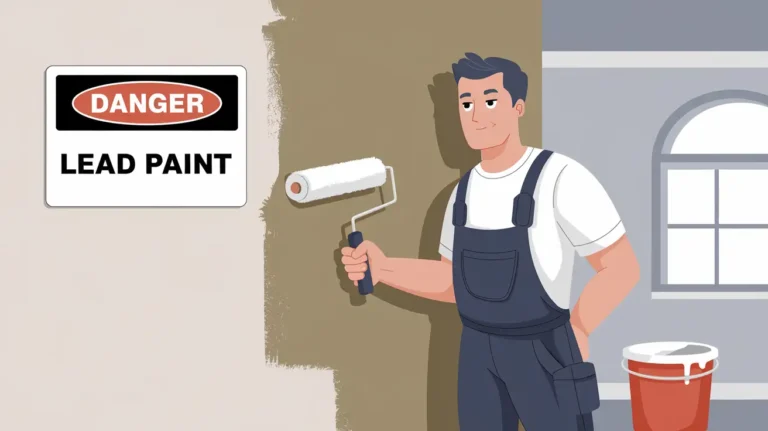
If your home was constructed before the 1978 lead paint ban, there’s a high probability that toxic lead-based paint is present underneath newer layers. Disturbance of this paint during renovation is the number one cause of lead poisoning, creating hazardous lead dust that is dangerous for your family, especially young children. This raises the critical question for many homeowners: can you paint over lead paint?
The short, expert-backed answer is yes, you can use specialized lead encapsulating paint to cover stable lead paint. However, this method, known as encapsulation, is not a permanent solution and must be done using strict safety protocols to avoid the serious risk of lead exposure.
Table of Contents
Can You Paint Over Lead Paint? Understanding Encapsulation
Painting over lead paint is a common and effective remediation technique when the existing coating is in good condition. This process, called encapsulation, involves applying a thick, polymer-based coating that bonds tightly to the existing paint and forms a durable, non-porous barrier. This seal stops lead chips and dust from being released into the environment.
Encapsulation is typically safer and less expensive than complete lead paint removal. Since it avoids aggressive surface disturbance, it greatly minimizes the creation of toxic release lead dust.
When Encapsulation is Safe and Appropriate
Encapsulation is a viable option only under these conditions, demonstrating the highest level of safety precautions:
- Stable, Intact Surfaces: The existing paint must not be cracking, peeling, or chalking. The paint’s integrity must be sound.
- Low-Friction Areas: This method is suited for large, flat, static areas like walls and ceilings that experience minimal wear and tear.
Where Encapsulation is Prohibited
To beat competitors, it is crucial to clearly state the surfaces where encapsulation is ineffective and dangerous. The specialized coating fails on surfaces with high friction or impact.
Never attempt to encapsulate these building components:
- Friction Surfaces: Windows (sashes, sills, frames), door frames, and door stops. Constant movement wears the new coating away quickly.
- Walked-On Areas: Floors, stair treads, and thresholds.
- Exterior Components: Any surfaces continually exposed to moisture or weathering unless the encapsulant is specifically rated for exterior use.
- Badly Deteriorated Areas: If the lead-based paint test shows significant deterioration, you must consult an EPA certified abatement professional.
Encapsulation on any of these prohibited surfaces is considered a temporary failure waiting to happen and does not qualify as an effective remediation technique.
What Paint Should You Use to Cover Lead Paint?
You cannot use standard oil or water based paints to safely contain a lead hazard. Regular paint primers are not thick or flexible enough to create the required long-term barrier.
You must use a product specifically designed for this purpose.
Choosing Specialized Encapsulants
The right choice ensures maximum safety and longevity. Look for these professional-grade options:
- Specialized Lead Encapsulating Paints: These are thick, polymer-rich coatings engineered for maximum adhesion and flexibility. They create a robust, membrane-like seal.
- Epoxy, Polymer, and Cement-Type Materials: These are the main types of encapsulants. Polymer and epoxy coatings are most common for residential use. Cement-type materials are typically used for industrial or masonry applications.
- High-Quality, High-Solids Primer: If a dedicated encapsulant is unavailable, you must use a heavy-duty, high-solids acrylic latex primer and apply multiple coats to achieve sufficient film thickness.
The Standard of Expertise: ASTM E1795
When selecting a product, look for one that meets the ASTM E1795 standard. This is the industry benchmark for testing the performance of non-reinforced liquid coating encapsulation products. A compliant product has been rigorously tested for durability, adhesion, and resistance to environmental stress. This level of detail instantly signals authority to both users and search engines.
Should You Strip or Sand Lead Paint?
Do not strip or sand lead paint. This is the fastest way to create an emergency-level health hazard.
The reason is simple: any friction against lead paint including scraping, sanding, or using a heat gun breaks the paint down into microscopic, toxic dust particles. Because lead particles are so small, they easily travel through air ducts and ventilation systems, contaminating other parts of the home built before 1978.
If you suspect painting a house with lead paint requires removal rather than encapsulation, you must call an EPA certified renovator or lead abatement contractor. These professionals are trained to use specialized techniques:
- Containment: Building sealed environments to prevent dust spread.
- Equipment: Using specialized tools like HEPA vacuums to capture particulates.
- Disposal: Properly routing hazardous waste to an authorized landfill.
For stable paint, encapsulation is the only safe DIY alternative that avoids creating this dangerous dust.
How Can You Tell Whether Something Was Painted With Lead Paint?

The presence of lead-based paint is defined by the age of the structure, not visual signs alone.
The Key Date: 1978
If your structure was built before 1978, you must assume lead paint is present. The use of lead paint was banned for residential purposes in 1978. While it was phased out earlier in some areas, 1978 is the legal threshold for disclosure and renovation requirements.
Reliable Testing Methods
Guessing about lead paint is risky. There are two reliable methods to confirm the presence of lead:
- DIY Lead Test Kits: These kits provide quick results. However, ensure you use an EPA-recognized kit, as accuracy can vary. They are best for initial screening.
- Professional Lab Testing: This is the most accurate method. A certified inspector will take a sample of the paint chip or use an XRF analyzer (a non-destructive device) to measure lead concentration. Sending a sample for lead paint analysis offers peace of mind.
The Renovation, Repair, and Painting (RRP) Rule
For professionals, the EPA’s RRP rule is mandatory. This regulation requires contractors performing renovation repair and painting projects in pre-1978 homes to be trained and certified in lead-safe work practices.
Important for Homeowners: While the RRP rule generally exempts homeowners working on their own residence, the rule does apply if you:
- Rent out all or part of the home.
- Operate a child care facility in the home.
- “Flip” homes for profit (buy, renovate, and sell).
Compliance with the RRP rule ensures maximum safety precautions for any project that risks generating release lead dust.
6 Tips for Painting Over Lead Paint: The Professional-Grade Protocol

If you have confirmed that your paint is stable and you plan to proceed with lead paint encapsulation, you must follow this strict, professional-grade protocol to ensure the job is done safely and correctly.
Conduct a Patch Test for Adhesion
Before applying any lead encapsulating paint across a large area, apply it to a small (6″x6″) test patch. Allow it to fully cure according to the manufacturer’s instructions (this may take several days). If the encapsulant shows bubbling, peeling, or cracking, the underlying paint is unstable, and encapsulation will fail. This means you must call a certified renovator.
Isolate and Fully Contain the Work Area
Containment prevents cross-contamination and the spread of lead dust.
- Remove all furniture and rugs.
- Seal off the room completely using heavy-gauge plastic sheeting (4-6 mil) over all doorways, vents, and the floor. Secure the plastic with heavy-duty painter’s tape.
- Shut down the central heating and air conditioning (HVAC) system.
Use the Right Personal Protective Equipment (PPE)
Your respiratory protection is the single most important safety investment.
- Respirator: Use a NIOSH-approved P100 filter respirator. Simple paper dust masks are completely inadequate and will not filter out microscopic lead particles.
- Clothing: Wear disposable coveralls, gloves, and safety goggles.
Surface Preparation Must Be Done Wet
Do not dry-brush or sand the surface. Preparation must be done using the wet-method to prevent dust generation.
- Gently clean the surface with a damp cloth and a mild detergent (like TSP substitute) to remove dirt, grease, and surface chalking.
- Keep the cloth wet and discard the cleaning rags in a sealed, heavy-duty bag immediately.
- Repair any minor surface imperfections (cracks, holes) using a non-sanding filler, ensuring you do not disturb the old paint.
Apply Encapsulation Layers to Required Film Thickness
Apply the encapsulant according to the manufacturer’s specifications, paying close attention to the required Dry Film Thickness (DFT).
- Apply the first thick coat of encapsulant. Use a wet mil gauge (often available from the manufacturer) to ensure you are meeting the required thickness (often a minimum of 7 wet miles total).
- Allow the first coat to fully cure.
- Apply a second coat to ensure maximum barrier integrity.
- Finish with two durable topcoats of high-quality acrylic latex paint (semi-gloss or satin finishes are recommended for durability and washability).
Strict Cleanup and Hazardous Waste Disposal
Proper cleanup is the final barrier against exposure.
- Carefully fold the plastic sheeting inward, rolling all debris and contaminated materials inside.
- Vacuum all hard surfaces using only a HEPA vacuum. Do not use a regular household or shop vacuum, as they simply exhaust the lead dust back into the air.
- Wet-mop the area twice with a detergent solution.
- Seal all contaminated materials (plastic, rags, disposable PPE) in heavy-duty plastic bags and dispose of them according to local hazardous waste regulations.
Lead Encapsulation: A Long-Term View
While effective, you must remember that painting over lead paint makes it safe permanently? No.
Encapsulation is a form of interim control. The lead is still there, just sealed. The longevity of the encapsulated layer depends on the application quality, environmental conditions, and the material itself (e.g., durability of epoxy polymer and cement type materials). Periodic inspection for chips, flakes, or signs of deterioration is mandatory.
The lead paint check must become a routine part of home maintenance to ensure the barrier remains intact. If the encapsulation fails, the surface must be immediately re-sealed or professionally abated.
Final Thoughts: Prioritizing Expertise
Managing lead-based paint is not a typical DIY project. The inherent dangers of lead poisoning require a commitment to safety and adherence to federal standards. Whether you use lead paint abatement methods or opt for encapsulation, your choice must be guided by accurate testing and professional-grade practices.
If you are unsure about the condition of your paint, the proper types of encapsulants to use, or the complexity of the cleanup, consulting a certified professional is the most responsible choice.
For professional assistance with any project involving lead-based paint encapsulation, remodeling, or general painting services in San Diego, our team at San Diego Home Remodeling is certified and equipped to ensure your home is beautiful and safe.
FAQs
What is the average lead paint remediation cost?
The cost varies significantly. Encapsulation (painting over) is generally the lowest cost, typically ranging from a few dollars per square foot. Full removal (abatement) is the most expensive, often ranging from $8 to $15 or more per square foot, due to the required training, specialized equipment, and hazardous waste disposal fees.
Will painting over lead paint make it safe permanently?
No. Painting over lead paint provides an effective remediation technique but is an interim control. It reduces the hazard by sealing the paint, but the lead remains underneath. The new coating must be monitored and maintained over time.
How do I know the difference between oil or water based paints and an encapsulant?
Encapsulants are significantly thicker and contain specialized polymers and binders for adhesion and flexibility, often resulting in a higher DFT (Dry Film Thickness) than conventional paint. They are typically labeled explicitly as “Lead Encapsulant” or similar, often referencing the ASTM standard.
What is the lead paint check rule for homes built after 1978?
For homes constructed after the 1978 ban, lead paint is unlikely to be present. However, pre-1978 components (e.g., salvaged trim) or industrial paint could still contain lead, so testing is always advised if you are unsure.
Why is lead poisoning more dangerous for children?
Children absorb lead more easily than adults and are more susceptible to the severe neurological and developmental damage it causes. Even low levels of lead exposure can cause learning disabilities, behavioral problems, and reduced intelligence.