Replacing your home’s exterior siding is one of the most important home improvement projects you can take on. It is a crucial layer of protection that guards your structure against moisture, pests, and severe weather. The full process involves carefully removing the old material, inspecting for underlying damage, installing new weather protection, and precisely securing new panels.
This guide provides how to replace siding on a house with the expert steps, tools, and cost data you need for a successful siding replacement, whether you hire a pro or plan a detailed DIY job.
Table of Contents
Signs Your Siding Needs to Be Replaced

Check your siding twice a year for damage. Catching problems early saves thousands in repairs.
Physical Damage Signs:
- Cracks or holes in panels
- Warped or buckled sections
- Soft spots when you press on wood siding
- Peeling paint that won’t stay fresh
- Pieces falling off or hanging loose
- Faded color that looks chalky
Hidden Problem Indicators:
- Water stains on interior walls
- Mold or mildew growth near the foundation
- Higher heating and cooling bills
- Rot behind panels (check with a screwdriver)
- Loose or missing pieces after storms
If you spot three or more of these issues, full siding replacement makes more sense than patching. A siding repair contractor can assess the damage and give you an honest opinion.
Types of Siding
Choosing the right material affects your home’s protection, maintenance needs, and budget for the next 20-50 years.
Vinyl Siding
Cost: $3-$8 per square foot installed
Lifespan: 20-30 years
Made from PVC plastic, vinyl siding resists moisture and insects. It comes in dozens of colors and textures. The material won’t rot, but it can crack in extreme cold or fade under intense UV light. How long does vinyl siding last? Expect 25 years on average with minimal care.
Pros: Low maintenance, affordable, many style options
Cons: Can crack in freezing weather, fades over time, not eco-friendly
Wood Siding
Cost: $8-$15 per square foot installed
Lifespan: 20-40 years with proper care
Cedar, pine, and redwood create a classic look. Wood siding can be painted or stained any color. It needs restaining every 3-5 years and immediate repairs when damaged. Wood breathes naturally but attracts insects and absorbs moisture.
Pros: Beautiful natural appearance, can be customized
Cons: High maintenance, fire risk, expensive, prone to rot
Fiber Cement Siding
Cost: $10-$14 per square foot installed
Lifespan: 30-50 years
Made from Portland cement, sand, and cellulose fibers, this material handles harsh weather better than most options. It resists fire, insects, and rot. Fiber cement can mimic wood grain or smooth stucco. The main downside is weight and installation difficulty.
Pros: Fire-resistant, long-lasting, looks like wood
Cons: Heavy, needs professional installation, requires repainting every 10-15 years
Aluminum Siding
Cost: $5-$9 per square foot installed
Lifespan: 25-40 years
Lightweight and rust-resistant, aluminum works well in coastal areas. It dents easily but won’t rot or burn. Modern versions come with baked-on finishes that last 20+ years.
Pros: Won’t rust, fire-resistant, recyclable
Cons: Dents easily, can fade, less insulation value
Composite Siding
Cost: $7-$12 per square foot installed
Lifespan: 25-30 years
Engineered from wood fibers and resin, composite siding combines wood’s look with better durability. It resists moisture and insects better than natural wood.
Pros: Looks like real wood, less maintenance than wood
Cons: More expensive than vinyl, can still absorb some moisture
Material Selection
When deciding how to change siding on a house, consider your local climate. For example, vinyl is affordable but can become brittle in extreme cold. Fiber cement siding (like Hardie Board) is heavy and costs more to install, but offers superior protection against wind and fire, making it a highly durable, long-term investment.
What You'll Need to Replace Siding
Having the right tools prevents delays and mistakes.
Essential Tools:
- Pry bar (18-24 inch for leverage)
- Claw hammer
- Utility knife with extra blades
- Measuring tape (25-foot minimum)
- 4-foot level
- Circular saw or siding cutter
- Zip tool (for vinyl siding removal)
- Nail gun or hammer
- Caulk gun
- Tin snips (for cutting vinyl)
Safety Gear:
- Work gloves (leather or rubber)
- Safety glasses (ANSI-rated)
- Dust mask or respirator (N95 or better)
- Sturdy ladder rated for your weight plus materials
- Hard hat for multi-story homes
Materials:
- New siding panels (order 10% extra for waste)
- House wrap (Tyvek or similar)
- Flashing tape
- Exterior-grade caulk
- Galvanized nails (1½ to 2 inches)
- Primer and paint (for wood or fiber cement)
- J-channel and corner pieces
Tool Rental vs. Purchase: Rent expensive tools like a pneumatic nail gun ($40-60/day) or siding brake ($75-100/day) if this is a one-time project. Buy basic tools you’ll use again.
Preparation and Demolition
Proper preparation is the most critical step to ensure a secure and long-lasting siding installation.
Step 1: Secure Permits and Prep the Area
A siding replacement project usually requires a building permit from your local municipality. Always check your local building codes first.
- Clear the perimeter. Move all patio furniture, grills, and plants at least 15 feet away.
- Remove gutters, downspouts, shutters, and light fixtures attached to the exterior walls.
- Protect landscaping with tarps draped over bushes and gardens.
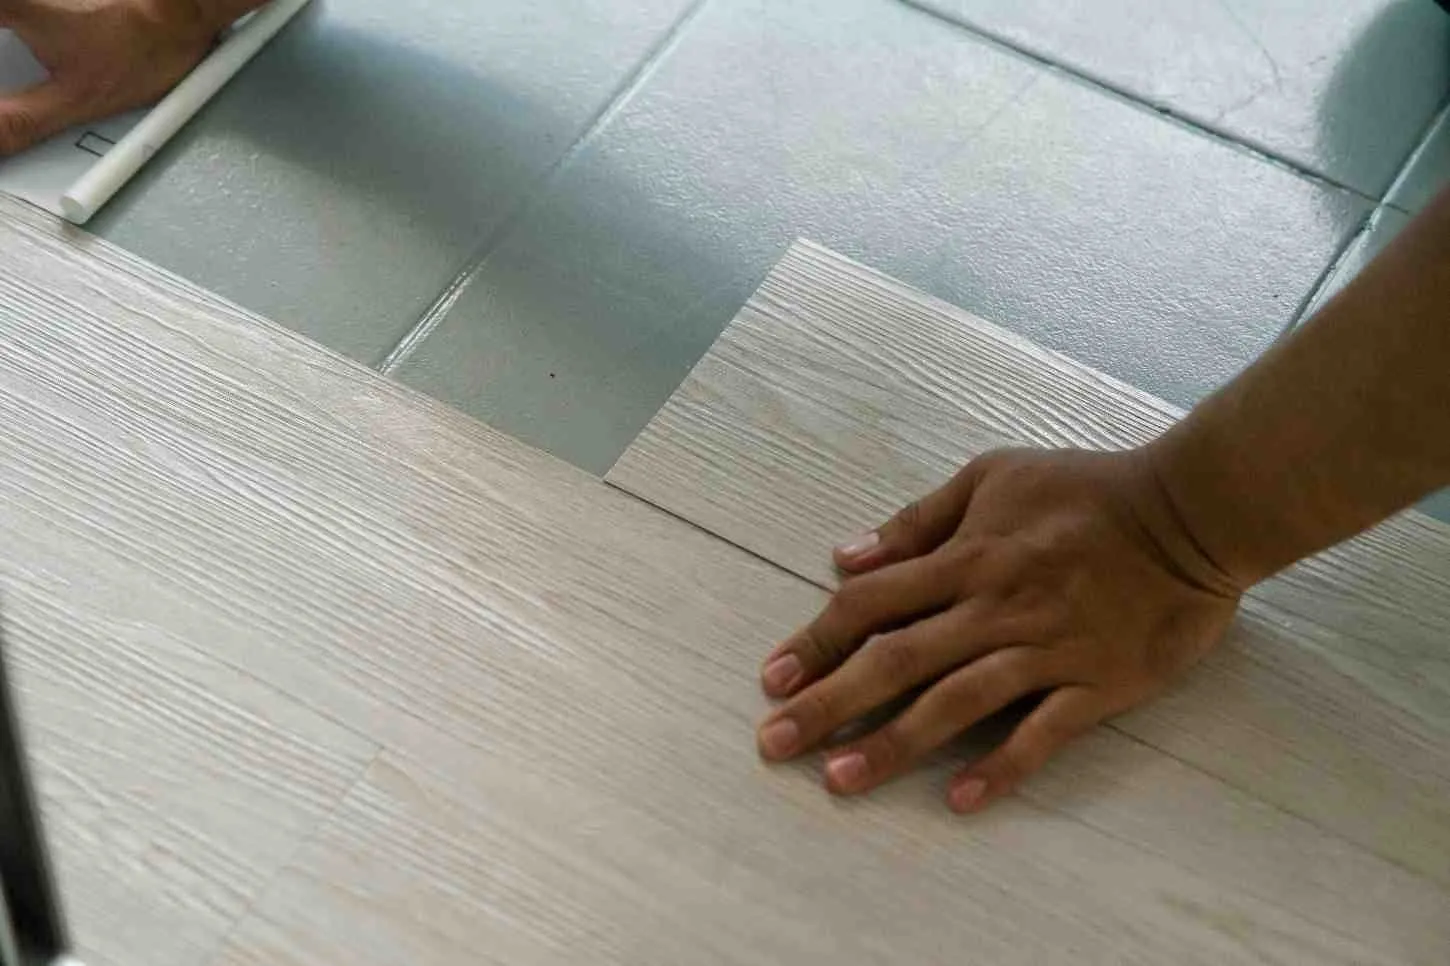
Step 2: Carefully Removing the Old Siding
Work from the top down. Use a pry bar to gently lift and pull the old panels away from the wall. This task requires finesse; yanking can damage the underlying wall sheathing.
- Collect and discard the materials into a rental dumpster.
- Pro Tip: Use a strong magnet to sweep the ground and yard for loose nails. This prevents flat tires and future rust issues.
Step 3: Inspect, Repair, and Install House Wrap
Once the old siding is gone, the sheathing is exposed. This is your chance to address hidden problems.
- Inspect for Damage: Look for signs of water damage, mold, or rot on the plywood or OSB sheathing. Repair or replace any damaged sections before continuing.
- Install House Wrap: This invisible raincoat is vital. Secure a house wrap (a synthetic weather barrier) over the entire wall, overlapping the seams by at least 6 inches. This creates a secondary line of defense against moisture intrusion.
- Install Flashing: Apply water-resistive flashing tape around all windows, doors, and utility penetrations (like hose spigots and vents). This directs any moisture that gets behind the siding back to the exterior.
How to Replace Vinyl Siding
Vinyl is the most DIY-friendly option. The interlocking system makes installation straightforward once you understand the technique.
Step 1: Remove Damaged Panels
Start at the top and work down. Use a zip tool to unlock the panel above the damaged section. Slide it under the bottom edge and pull down to release the interlock. Then use your pry bar to remove nails. Track every nail loose, puncture tires and feet.
Step 2: Inspect the Sheathing
Check the OSB or plywood underneath for soft spots, dark stains, or visible mold. Press with your hand it should feel solid. Replace any water-damaged sections before installing new siding. This step is critical. Replacing vinyl siding over rotten sheathing is like putting a bandage on a broken bone.
Step 3: Install House Wrap
If you removed large sections, add new house wrap. Overlap seams by 6 inches and staple every 12-18 inches. This moisture barrier is your home’s raincoat. Add flashing tape around windows and doors.
Step 4: Cut and Position New Panels
Measure the gap and cut vinyl siding ¼ inch shorter to allow for expansion. Vinyl expands and contracts with temperature changes. Cut too tight and panels buckle in summer heat. Use tin snips for clean cuts.
Step 5: Lock Bottom Edge First
Hook the bottom channel of your new panel into the top channel of the existing panel below it. You should hear and feel it snap into place. Apply gentle upward pressure while nailing.
Step 6: Nail Properly
Center nails in the slots never through the panel face. Leave 1/16 inch between the nail head and vinyl. Panels need room to move. Nailing too tight causes ripples and cracks.
Step 7: Continue Upward
Work from bottom to top, overlapping horizontal seams by 1 inch. Stagger vertical seams by at least 24 inches between rows. This prevents water infiltration.
How to Replace Plywood Siding
Plywood sheets cover large areas quickly. The bottom edges rot first from ground moisture.
Step 1: Remove Damaged Panels
Use your pry bar and claw hammer to carefully remove nails. Save the old panel as a template. Work slowly to avoid damaging adjacent sheets.
Step 2: Clean the Surface
Remove old nails, loose caulk, and flaking paint. A wire brush helps. Check exposed framing for rot or insect damage.
Step 3: Measure and Cut
Lay your template on new plywood and trace. Mark window, vent, and outlet cutouts clearly. Double-check measurements before cutting. Use a circular saw for straight edges and a jigsaw for openings. Make sure panel grooves run vertically (up and down).
Step 4: Install New Plywood
Position the panel and nail every 6 inches along the studs. Use 8d galvanized nails. Keep nails ½ inch from edges to prevent splitting.
Step 5: Seal and Finish
Apply exterior caulk to all seams and edges. Don’t skip this water through tiny gaps. Prime bare plywood within 48 hours. Apply two coats of exterior paint. Quality primer prevents future rot better than anything else.
How to Replace Wood Lap Siding
Wood lap siding installs in overlapping horizontal boards. Replace damaged sections between studs for solid attachment.
Step 1: Mark Your Cut Lines
Identify studs with a stud finder. Plan to cut at least 6 inches past the damaged area, ending your cuts at stud centers. This gives you solid nailing surfaces.
Step 2: Make Precise Cuts
Use an oscillating multi-tool to cut through nails hidden under the overlapping board above. Set blade depth to avoid cutting into house wrap. Remove the damaged section with your pry bar.
Step 3: Clear and Prep
Remove all old nails and loose material. Check for carpenter ants or termite damage. Treat if needed.
Step 4: Cut Replacement Board
Measure twice, cut once. Test fit before applying any fasteners. The new board should slide under the piece above and overlap the piece below by at least 1 inch.
Step 5: Secure the Board
Face-nail into studs using 8d galvanized nails. Place nails 1 inch from the bottom edge. Blind-nail the top edge under the overlapping board above (if possible). This hides nail heads.
Step 6: Prime and Paint
Caulk all joints and nail holes. Prime within 24 hours of installation. Apply two coats of exterior paint, allowing proper drying time between coats. Back-prime (paint all sides before installing) for maximum protection.
How to Replace Fiber Cement Siding
Fiber cement is durable but heavy and brittle. Handle with care to avoid cracking.
Step 1: Remove Damaged Boards
Score the caulk line with a utility knife. Use your pry bar to gently lift boards. Fiber cement breaks easily, so work slowly.
Step 2: Pull Nails from Upper Board
The board above overlaps yours. Carefully remove its bottom nails so you can slide new boards underneath.
Step 3: Cut New Boards
Wearing a dust mask fiber cement creates fine silica dust. Use a circular saw with a fiber cement blade or score-and-snap technique. Measure exact lengths.
Step 4: Blind-Nail Bottom Boards
Start with the lowest replacement board. Nail through the top edge at a slight upward angle. Use stainless steel or hot-dipped galvanized nails. Space nails 16 inches apart along studs.
Step 5: Face-Nail Top Boards
The final board needs face nails since you can’t access the top edge. Nail through both the new board and the one above it. Pre-drill holes to prevent cracking.
Step 6: Prime and Paint
Fiber cement comes primed but needs paint. Some brands offer pre-painted options. Apply two coats of 100% acrylic paint. Paint protects against moisture absorption.
How Much is it to Replace Siding on a House?
The cost of siding a house is a significant factor in any home renovation budget. The price is driven by the material, labor rates in your area, and the size of your home.
The average price to replace siding for a typical 2,000 square foot home falls between $17,000 and $25,000 for mid-range materials like vinyl or fiber cement, installed by a contractor.
Cost Breakdown for 2,000 sq. ft. Home (2025 Estimate) | Average Cost Range |
Material Cost (Vinyl/Fiber Cement) | $7,000 – $12,000 |
Labor (Siding Installation Cost) | $8,000 – $10,000 |
Old Siding Removal & Disposal | $1,000 – $2,000 |
House Wrap, Trim, Flashing, Caulk | $1,500 – $3,000 |
Total Project Cost (Contractor) | $17,500 – $27,000 |
Note: This estimate is for a professional crew. A DIY replacing siding on a house project saves the labor cost but requires rental tools and significant time.
Common Mistakes to Avoid
These errors cause 80% of siding failures within five years.
- Skipping House Wrap: This moisture barrier prevents water from reaching your sheathing. Without it, trapped moisture rots wood framing in 2-3 years.
- Nailing Too Tight: Vinyl and aluminum need expansion room. Tight nails cause buckling, ripples, and cracks. Leave 1/16 inch gap between nail head and siding.
- Wrong Nail Placement: Always center nails in slots. Nailing at slot ends restricts movement and causes stress cracks.
- Ignoring Flashing: Windows and doors need proper flashing. Water seeps behind siding at these vulnerable spots and causes interior damage.
- Installing in Cold Weather: Vinyl becomes brittle below 40°F. It cracks during installation and doesn’t seal properly. Wait for temperatures above 50°F.
- Not Overlapping Properly: Horizontal seams need 1-inch overlap. Vertical seams should stagger by 24+ inches between rows. Poor overlap lets water penetrate.
- Forgetting Expansion Gaps: Cut vinyl panels ¼ inch shorter than the opening. Cut J-channel and trim pieces ⅜ inch short. Materials expand in heat.
- Mixing Old and New Fasteners: Use corrosion-resistant nails designed for your siding type. Mixing galvanized and aluminum nails causes rust streaks.
- Skipping Primer on Wood: Bare wood absorbs moisture in hours. Prime all surfaces, especially cut ends, within 24-48 hours of installation.
- Rushing the Project: Change siding properly or don’t start. Careful work prevents callbacks and ensures your warranty stays valid.
Best Time to Replace Siding
Weather affects installation quality and curing times.
- Spring (April-May): Ideal temperatures (50-75°F), moderate humidity, longer daylight hours. Book contractors early this is peak season.
- Summer (June-August): Warm and dry but potentially too hot for some materials. Vinyl can overheat. Paint dries too fast in 90°F+ weather.
- Fall (September-October): Perfect conditions. Mild temperatures, low humidity, stable weather. Second-best booking window before winter.
- Winter (November-March): Avoid if possible. Cold makes vinyl brittle. Paint won’t cure. Many contractors don’t work in freezing weather. Emergency repairs only.
- Best Overall: Late spring (May) or early fall (September) offer the most reliable conditions for replacing house siding.
Maintenance After Installation
Proper care extends siding life by 5-10 years.
Annual Tasks:
- Inspect for cracks, holes, or loose sections
- Clean with garden hose and soft brush
- Check caulk around windows and doors
- Clear vegetation touching siding
- Look for insect damage or nests
Every 3-5 Years:
- Deep clean with mild detergent
- Inspect and replace damaged caulk
- Check flashing and trim
- Repaint wood siding (as needed)
- Touch up fiber cement paint
Storm Damage Response:
- Inspect after severe weather
- Document damage with photos
- File insurance claims promptly
- Make temporary repairs to prevent water entry
- Schedule permanent repairs within weeks
Cleaning Methods by Material:
- Vinyl: Garden hose, soft cloth, mild soap solution
- Wood: Pressure washer on low setting (under 1,500 PSI)
- Fiber Cement: Pressure washer safe, avoid harsh chemicals
- Aluminum: Soft brush, avoid abrasive cleaners that scratch
Need Help Replacing the Siding on Your House?
The process involves safety risks, precise measurements, and specialized tools. If you are not comfortable with height, demolition, or structural repairs, hiring a qualified contractor for your siding replacement is the safest and most efficient path.
For expert exterior repair and replacement services, the team at San Diego Home Remodeling offers full-service whole home remodeling services in San Diego, including professional siding installation. We ensure your home receives a long-lasting, weather-tight exterior that enhances curb appeal and structural integrity.
Call San Diego Home Remodeling today for a no-obligation consultation on your siding project!
Conclusion
If you know how to replace siding on a house, you can save money on simple jobs and make smart choices on big ones. Vinyl is the easiest to install yourself, whereas fibre cement lasts the longest. Wood is beautiful and durable, but it needs to be cared for regularly.
The steps include carefully removing old panels, fixing water damage, installing appropriate moisture barriers, and using the proper methods to attach new siding. The average cost of professional installation for a home is between $7,500 and $18,000.
Fixing things that are less than 200 square feet is a nice DIY job. When you need to replace the siding on your entire house, it’s typically worth hiring skilled workers. They know the building rules, finish faster, and stand by their work.
Take good care of your home. Begin with a comprehensive inspection, select high-quality materials, and never forget the house wrap or flashing. The siding on your house is its first line of defence against the weather.
FAQs About How to Replace Siding on a House
How long does vinyl siding last?
Vinyl siding typically lasts between 20 and 40 years, depending on the quality of the material and the severity of the climate. Proper siding repair contractors will tell you that quality installation is key to achieving that maximum lifespan.
Can I install new siding over old siding?
While technically possible, it is not recommended. Installing new siding over old material makes it impossible to inspect and repair the underlying wall sheathing for water damage, mold, or rot. Carefully removing the old layer is always the best practice.
How long does a full siding replacement project take?
For a professional crew, siding replacement on an average-sized home takes between 3 to 7 days. A DIY project, depending on experience level, often takes two to three weeks.
What should I look for when hiring siding repair contractors?
Look for contractors who are licensed, insured, and certified by the siding manufacturers (e.g., VSI for vinyl, James Hardie for fiber cement). Ask to see examples of their previous work and ensure they include details like house wrap and flashing in their written quote.
What is the biggest mistake people make in replacing vinyl siding?
The most common mistake is nailing too tightly. Vinyl siding requires room to expand and contract with temperature changes. Nails must be centered in the slots and left slightly loose to prevent the panels from buckling or warping in the heat.